Actionable Guide to Technical SEO (On-Page)

Technical and on-page SEO techniques work together to help you improve your rankings. There’s no need to feel overwhelmed about learning the ins and outs; here, we’ll take you through everything you need to know and have you on your way to SEO success in no time.
Table of Contents
The difference between technical and on-page SEO
When it comes to mastering your SEO strategy, you need to understand how all the different techniques work on their own and, more importantly, how they come together to create a website that Google will rank well.
We can divide SEO techniques into three categories:
- Technical SEO
- On-page SEO
- Off-page SEO
When implementing an SEO strategy, you must focus on all three, as all will impact how Google reads and ranks your website. So what do the three categories mean?
Technical SEO - Technical SEO refers to the techniques that help Google to crawl and index your website. These are the “back-end” elements that will directly impact how your website is analysed and indexed by Google and, in turn, how well the search engine will rank you. If you haven’t mastered your technical SEO, then you can wave goodbye to good search rankings!
Run a Site Audit for FREE with SEMRush
On-page SEO - On-page SEO refers to the overall setup and content of your website. These elements help Google determine aspects such as the quality of the user experience and how relevant your content is to your target keywords. On-page SEO is the process of optimising every element of a web page from top to bottom. These techniques focus more on the aspects that a user will see when they visit your website.
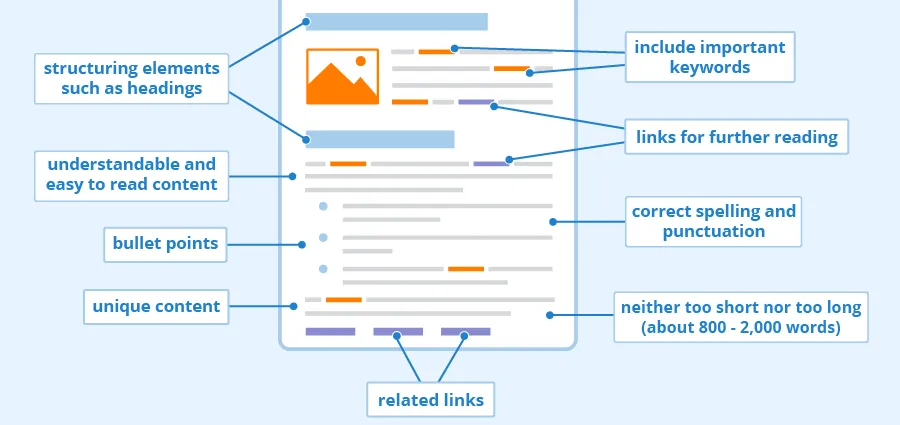
Off-page SEO - Off-page SEO differs from technical and on-page SEO in that it refers to SEO techniques that are undertaken away from your website. The main focus of off-page SEO is driving relevant traffic to your website through social shares and, mainly, building a solid backlink profile. We’ll discuss off-page SEO in more detail in the link building section.
Some SEO techniques can be classed as technical and on-page; remember, SEO is a recipe of various ingredients. They all work together and complement each other, but if one is missing, it risks ruining the result.
Below we’ve broken down the key SEO techniques, both technical and on-page, that, if you can master, will set you on the path for ranking success.
Internal Linking & SEO
In the next section, we’ll discuss the importance of building external backlinks for SEO but what some people often forget is that internal linking can have just as much of an impact on the success of your SEO strategy.
Internal links are links from one page on the same domain to another and are a great way of directing users to other pages of your website, helping to keep them on your site for longer and hopefully increasing the chance that they will convert.
Use the SEMRush Link Checker FREE
Internal links not only direct users around your website, but they work in the same way for Google’s crawlers and bots too. Linking to other pages on your website directs Google to more of your content, making it easier for the search engine to crawl your whole website, looking for high-quality content that it can rank for relevant search queries.
The more links you have pointing to a page, the more important Google will determine that page to be, and that goes for internal links too. If you’re linking to a particular page, often Google will acknowledge that this page must feature relevant and authoritative content.
Internal links will help to improve three key things:
User experience - A crucial part of the user experience of your site is navigation. A user needs to clearly and easily navigate your website, moving from one web page to the next to find exactly what they’re looking for. Internal links make moving around your website infinitely easier and therefore help to improve the overall user experience of your website.
Website crawlability - If no links are pointing to a web page, how is Google meant to find it? Internally linking to other pages within your website will help Google to crawl your website, finding new and updated content. You can make Google’s job much easier by implementing a solid internal linking structure.
Search rankings - Whilst internal links may not carry as much weight as external backlinks when it comes to ranking a page; they can have an impact. If Google can see that you are regularly linking to an internal page using relevant anchor text, it will help its bots understand the linked page better, ranking it accordingly.
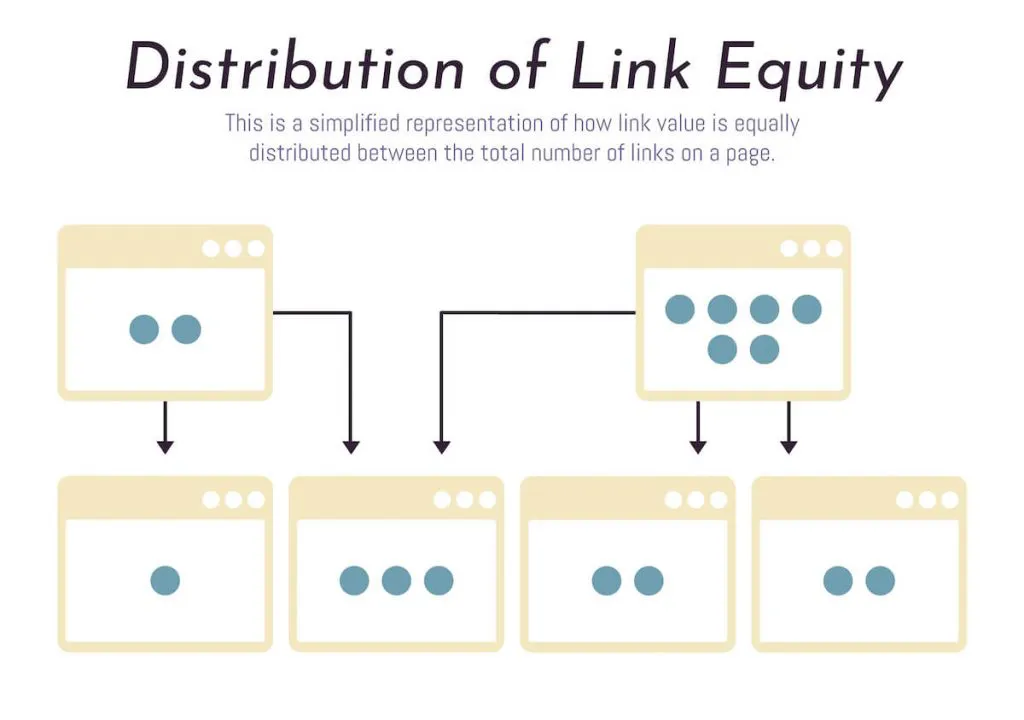
There are two main types of internal links that you can use within your website:
- Structural links
- Contextual links
Structural links are generally created within the design of your website and include elements such as menus, sidebars, footers and headers. They are the links that allow users to navigate your website easily. Structural links ensure that every page of your website is accessible without having to type the URL in, meaning no page goes missing.
Contextual links are the ones that you’ll mainly focus on when it comes to your SEO strategy. These are the ones that link to other pieces of content on your website and are used to offer users more context or information on a specific topic.
When creating a new piece of content, think about which existing pages it would be relevant to link to from within the body of the text and which keywords the linked page is targeting. These keywords should form part of your anchor text.
If you have a piece of content that ranks particularly well or a page with an excellent page rank, then these can be used to help boost other relevant pages on your website. For example, if you have a blog article on the benefits of protein powder that’s built up a good authority and you want to boost your e-commerce product page where you sell protein powders, an internal link from the article to the product page may well help to improve the product page’s authority and ranking.
You don’t need to add hundreds of internal links to each page for it to be effective. That would probably end up having the opposite effect. Depending on how long your content is, 2 or 3 internal links will be enough to start making an impact. As a rule, try to ensure that any page on your website is just three internal link clicks away from your homepage.
Sitemaps
A sitemap is a blueprint for your website. It’s a structured list of all of the web pages that feature on your website, and they help search engines find, crawl and index every page, ensuring none are missed. Sitemaps can also tell Google which pages of your website are the most important.
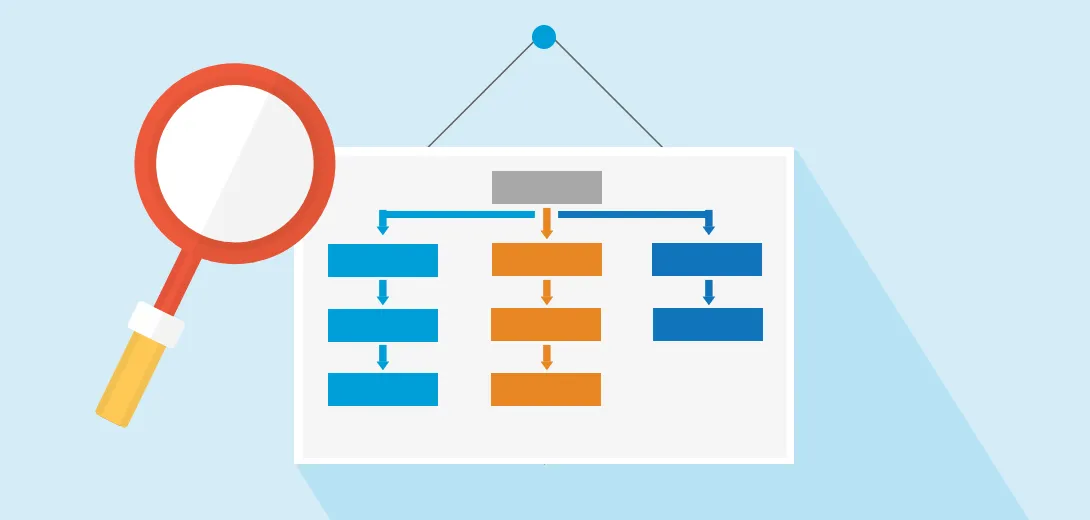
There are four main types of sitemap:
Normal XML Sitemap - This is the most common type of sitemap and the one that we will focus on for SEO purposes.
Video Sitemap - This is used to help Google understand the video content on your website.
News Sitemap - This helps Google find content websites that it will approve to be featured on Google News.
Image Sitemap - This allows Google to find all of the images hosted within your website.
Unlike most aspects of SEO, Sitemaps aren’t essential. Google themselves say that if your website is adequately linked thanks to your internal linking structure, then the search engine’s crawlers will be able to find every page anyway. Having a sitemap as well, though, certainly won’t do your website any harm.
Whilst not all websites need to have a sitemap; some would undoubtedly benefit from having one, such as:
- New websites with little or no existing backlinks directed to it.
- Large websites with hundreds of thousands of pages, e.g. an eCommerce website.
- Websites with multiple image files and galleries.
- Websites that contain pages with no internal links.
Sitemaps are also helpful as they include a lastmod feature. This will tell crawlers when a page was last updated, allowing them to determine if they need to re-crawl the page. Don’t be tempted to keep changing these dates if you’re not updating the content. Google has warned SEO experts that changing the date for pages where the content hasn’t been updated is a spammy SEO tactic that it doesn’t approve of.
If your website runs on WordPress, then you can use your Yoast SEO plug-in to create your sitemap for you. One of the benefits of using Yoast is that it will automatically update your sitemap whenever you add a new page to your website (e.g. a new blog or service offering), meaning you don’t have to.
If you’re not on WordPress, there are various other sitemap generator tools that will create the sitemap of your website for you. Whichever way you choose to create it, once you’ve got your sitemap, make sure you manually check it to ensure it features every single page on your website.
Once you’re happy with your sitemap, you can submit it to Google. You do this by going to your Google Search Console, navigating to Index and then Sitemaps and copy and pasting your sitemap URL into the relevant field.
You can use your sitemap within Google Search Console to ensure that there are no problems with Google indexing your website. If Google cannot index certain web pages, you can find out why and proceed to make the relevant changes required.
If you have an extensive website, then you may need to create more than one sitemap. A sitemap can’t contain more than 50,000 URLs, and the file itself cannot be more than 10MB. If you have more than 50,000 pages (which seems like a lot, but if you’re an eCommerce company, this could easily be the case), then you will need to split your sitemap up and submit all of them to Google Search Console.
If you need to create an XML sitemap, click here for a free generator.
HTTPS
There’s pretty much no excuse for not running your website on HTTPS these days. If you haven’t already made the switch, you need to be quick about it. HTTPS secures the connection between the user and the website, encrypting any data they submit to the website server.
You can figure out instantly if a website you’re visiting is secure and running on HTTPS as opposed to HTTP just by looking at the address bar. Next to the URL, you should see a closed padlock; this tells you that the website is secure. If the padlock is open or there’s another icon there, then the website is vulnerable to a cyber attack.
If you access a site that runs on HTTP, then all of the data sharing between a user and the website is done in plain sight. This includes things such as log-in details and passwords. There is no encryption, and anyone can access the traffic and information. That’s the last thing a user wants; imagine logging into your online banking knowing that technically anyone could access your details!
HTTPS secures and encrypts this connection, ensuring that no third parties can intercept any of the shared data between the two. To ensure your website is secure and running on HTTPS, you need an SSL certificate. Web browsers will check your website’s certificate and confirm its validity with the issuer.
The main benefit of running on HTTPS should be obvious, security. If your site and server aren’t secure, you’ll never build trust in your website and online brand. Everyone has the right to browse the internet safely and know that their personal data and information can’t be hacked. Even if you don’t think you’re handling any sensitive data, ensuring your website is secure helps to place you as a brand that users can trust.
HTTPS is also important for your SEO. Although it’s certainly not the top ranking factor, back in 2014, Google announced that it would now consider HTTPS as a minor ranking factor. Therefore if you’re running on HTTPS, you can presume Google will take note of this when ranking you in search results, mainly if you’re fighting for a spot against a website that’s still on HTTP.
Not only can HTTPS impact your rankings it also plays a part in the overall user experience of your website. Users need to be able to trust the website that they’re visiting. As people get more tech-savvy, users are more aware than ever of the risks of cyber attacks and hackers accessing their personal data. If they visit your website and feel unsafe or like their information is at risk, they’re far more likely to leave and find an alternative result, indicating to Google that your website shouldn’t appear in search results.
Whilst HTTPS may only be a minor ranking signal for Google, having a safe and secure website should always be your top priority.
Pro-tip, if you’re using WordPress, the ReallySimpleSSL plugin is fantastic for quickly converting your site to HTTPS.
Mobile Friendly
Being mobile-friendly essentially means that your website can shrink down and fit on any size screen and still work to its full potential. Users should access the website, view content and navigate around the site with the exact same ease that they could on the desktop version. If you achieve this, then your website is mobile-friendly.
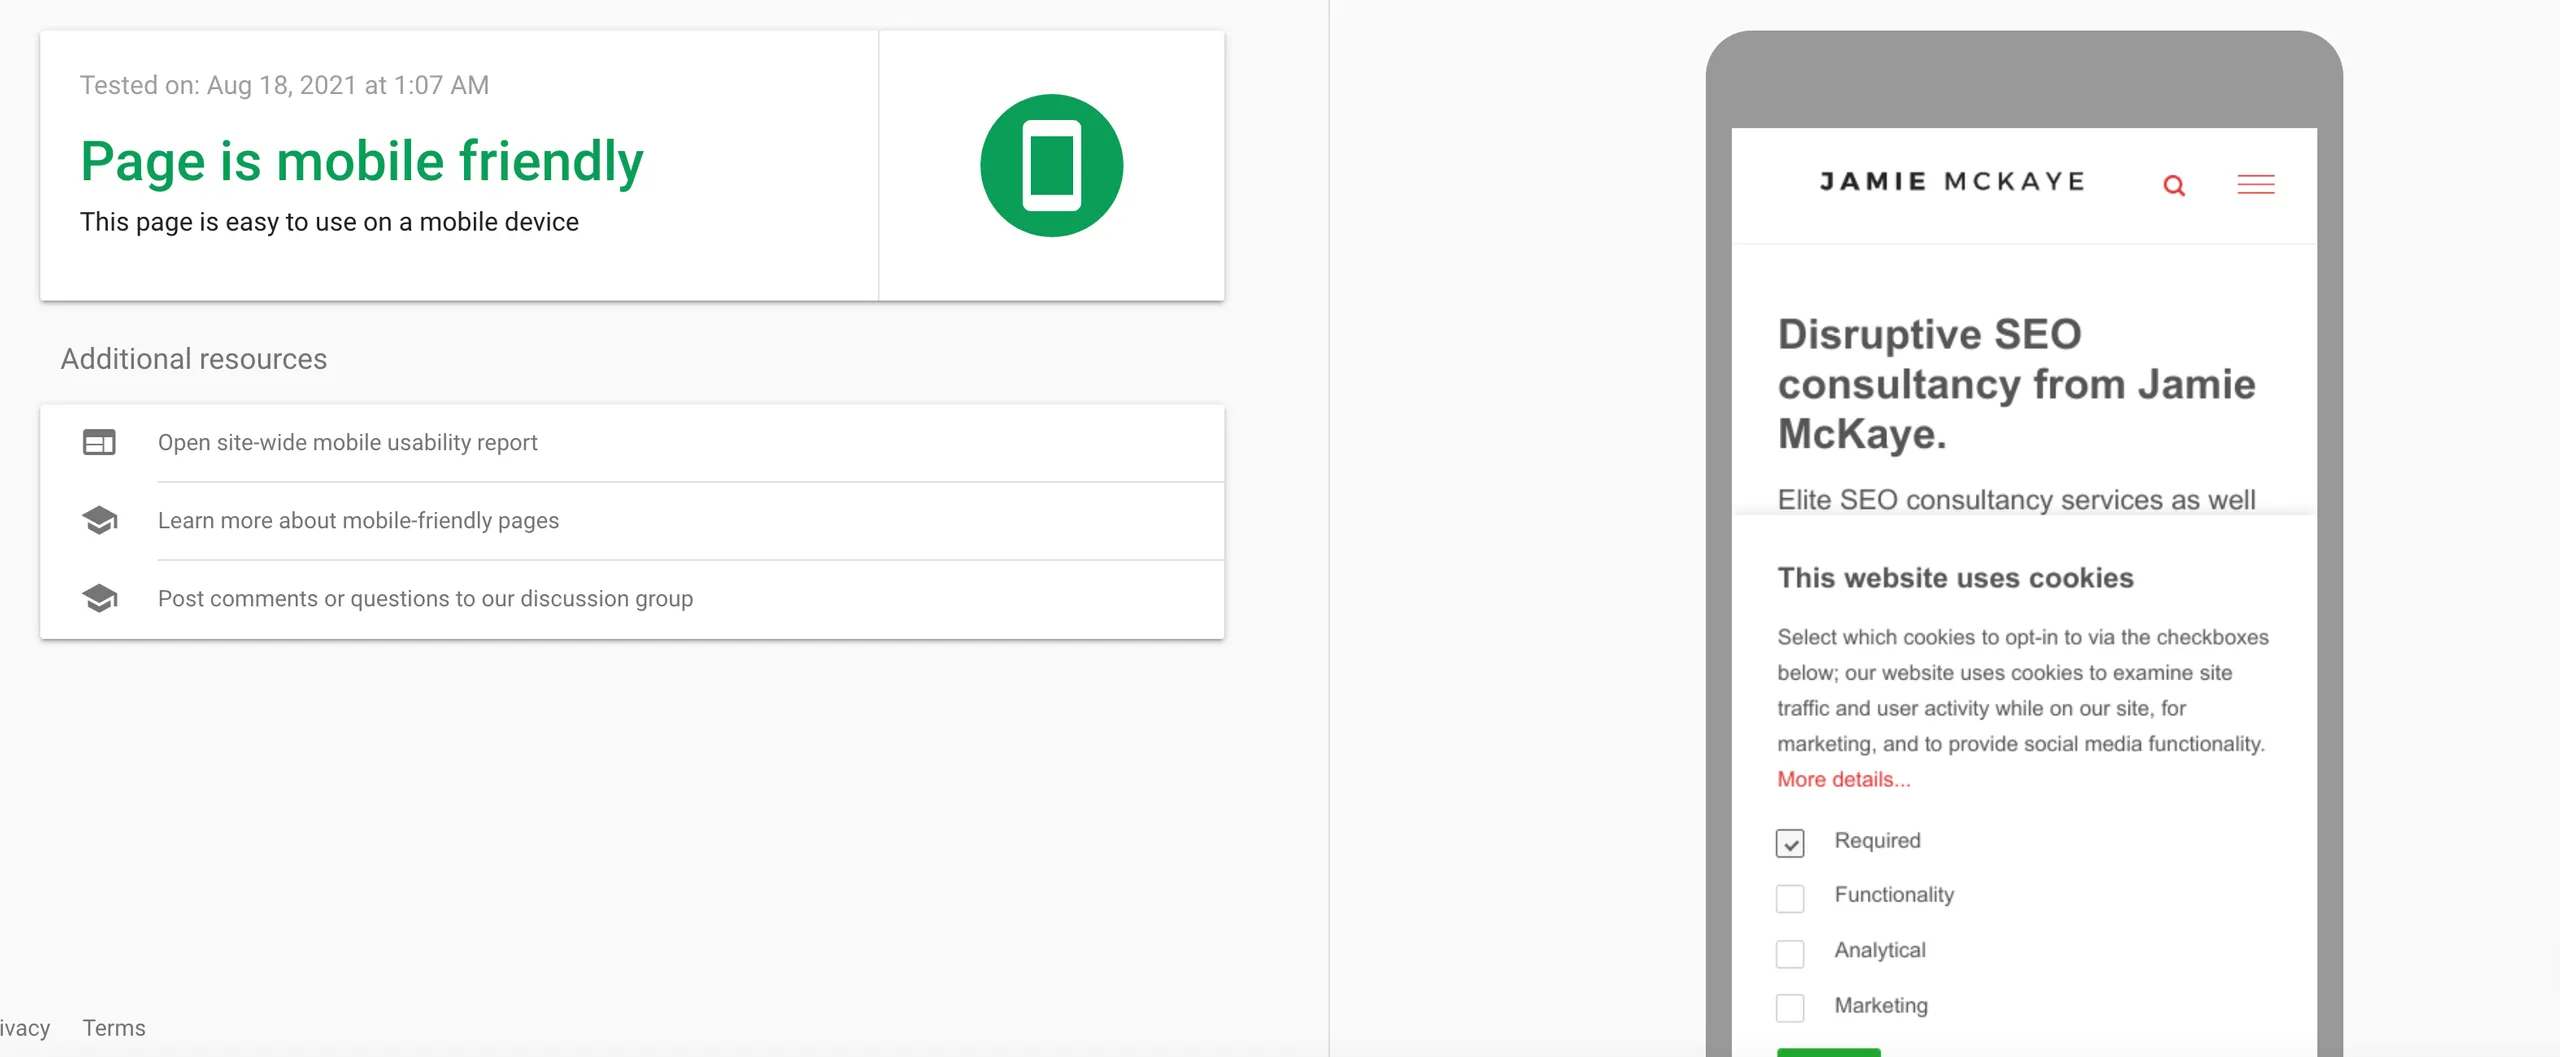
A mobile-friendly website should be:
Responsive - A responsive design ensures that your website will adapt to whatever device a user is accessing it from. It's almost impossible to predict how many different mobile devices are out there, from tablets and smartphones to smartwatches and e-readers, meaning you need to ensure your website will automatically adapt to the screen size and functionality of the device being used.
It's no longer just enough to display the same website on both desktop and mobile. Imagine what your desktop site would look like shrunk down to fit on a mobile device. It would be almost impossible to read, and the screen would be overcrowded. Instead, you need a responsive design that adapts to mobile devices and ensures the user experience of your website for mobile users is just as good as that of desktop users.
Fast - A key part of the mobile experience of your website is the page load speed. Users who are searching on a mobile device want quick answers, and they're not willing to wait around for ages for your website to load. If it's too slow, they'll simply bounce straight back off it and find a different result from the SERPs.
In the next section, we'll talk more about page speed and the key things you can do to ensure your website loads as quickly as possible.
Easy to navigate - Navigation is a crucial part of good web design for desktop and mobile, but it's particularly vital when targeting mobile users. Users need to easily navigate around your website to find the information they're looking for. If they find it too difficult to figure out how to move around and struggle to decipher what page the information they're looking for is on, they'll leave and find an alternative option.
When it comes to mobile design, one of the best ways to ensure your website is easy to navigate is with a hamburger menu. A hamburger menu is a name given to a menu icon at the top of the page with three lines. When a user clicks on the three lines (or the "hamburger"), a drop-down menu appears featuring the various pages they can navigate to.
Opting for a menu like this will help to keep the mobile version of your website clean and clear and makes navigation for users as easy as possible.
Readable - Users need to be able to read the content on your website; otherwise, what's the point in having it there in the first place? When optimising your website for mobile, it's all about ensuring the user experience for mobile users is up to scratch and a big part of that is the font you use for your content.
Whilst it might seem like something that can be an afterthought, you need to ensure that the font size is big enough to be read on a mobile device without the need to zoom in. Also, think about the colours and style you use, making sure they are easily legible on a mobile device. Stick to mobile-friendly fonts to have the best chance of users reading all of your content without bouncing off.
Free from annoying pop-ups - Pop-ups can be a great marketing tool. They're often a great way of directing people to specific areas of your website or an essential piece of content, and they work particularly well when encouraging users to sign up for a newsletter or downloading a free guide. One area that they don't work very well in, however, is on a mobile website.
Pop-ups on a mobile device can be annoying and distracting. A pop-up on a mobile device will likely fill the whole screen, completely hiding the information a user is looking for and often, it's not entirely clear how to get rid of the pop-up. This leads to users getting frustrated and leaving the website altogether, adding to your bounce rate and indicating to Google that your website isn't good enough to appear in the SERPs.
Thumb friendly - Hear me out on this one. Most users, when scrolling through a website on a mobile device, will use their thumbs. You need to make sure, therefore, that your website is 'thumb friendly'. What we mean by this is that you don't want any buttons or clickable links that are too big, too small, or that will get in the way of a scrolling thumb. If users keep accidentally clicking on the wrong button thanks to a poor design, they will soon become frustrated and look for a different website that they find easier to navigate.
Users don't interact with a website on mobile in the same way that they do on desktop. Often they have less patience and are after more instant results meaning you have less wiggle room to make sure you're providing them with the content they're looking for.
When it comes to SEO, having a mobile-friendly website is crucial. From 2019 Google began 'mobile-first indexing, which means the search engine now uses the mobile version of your website when crawling and indexing rather than the desktop version. So having a mobile website that's up to scratch is pretty important. If your website isn't mobile-friendly, you can expect your ranking position in search results to be impacted considerably.
Click here to see if your site is mobile-friendly
Local optimisation for mobile
Optimising your website for mobile goes hand in hand with optimising your website for local SEO too. When users are searching for local results, they more often than not are on-the-go meaning they're searching using a mobile device.
More and more mobile searches include phrases such as "near me" and "open now" or other location navigators.
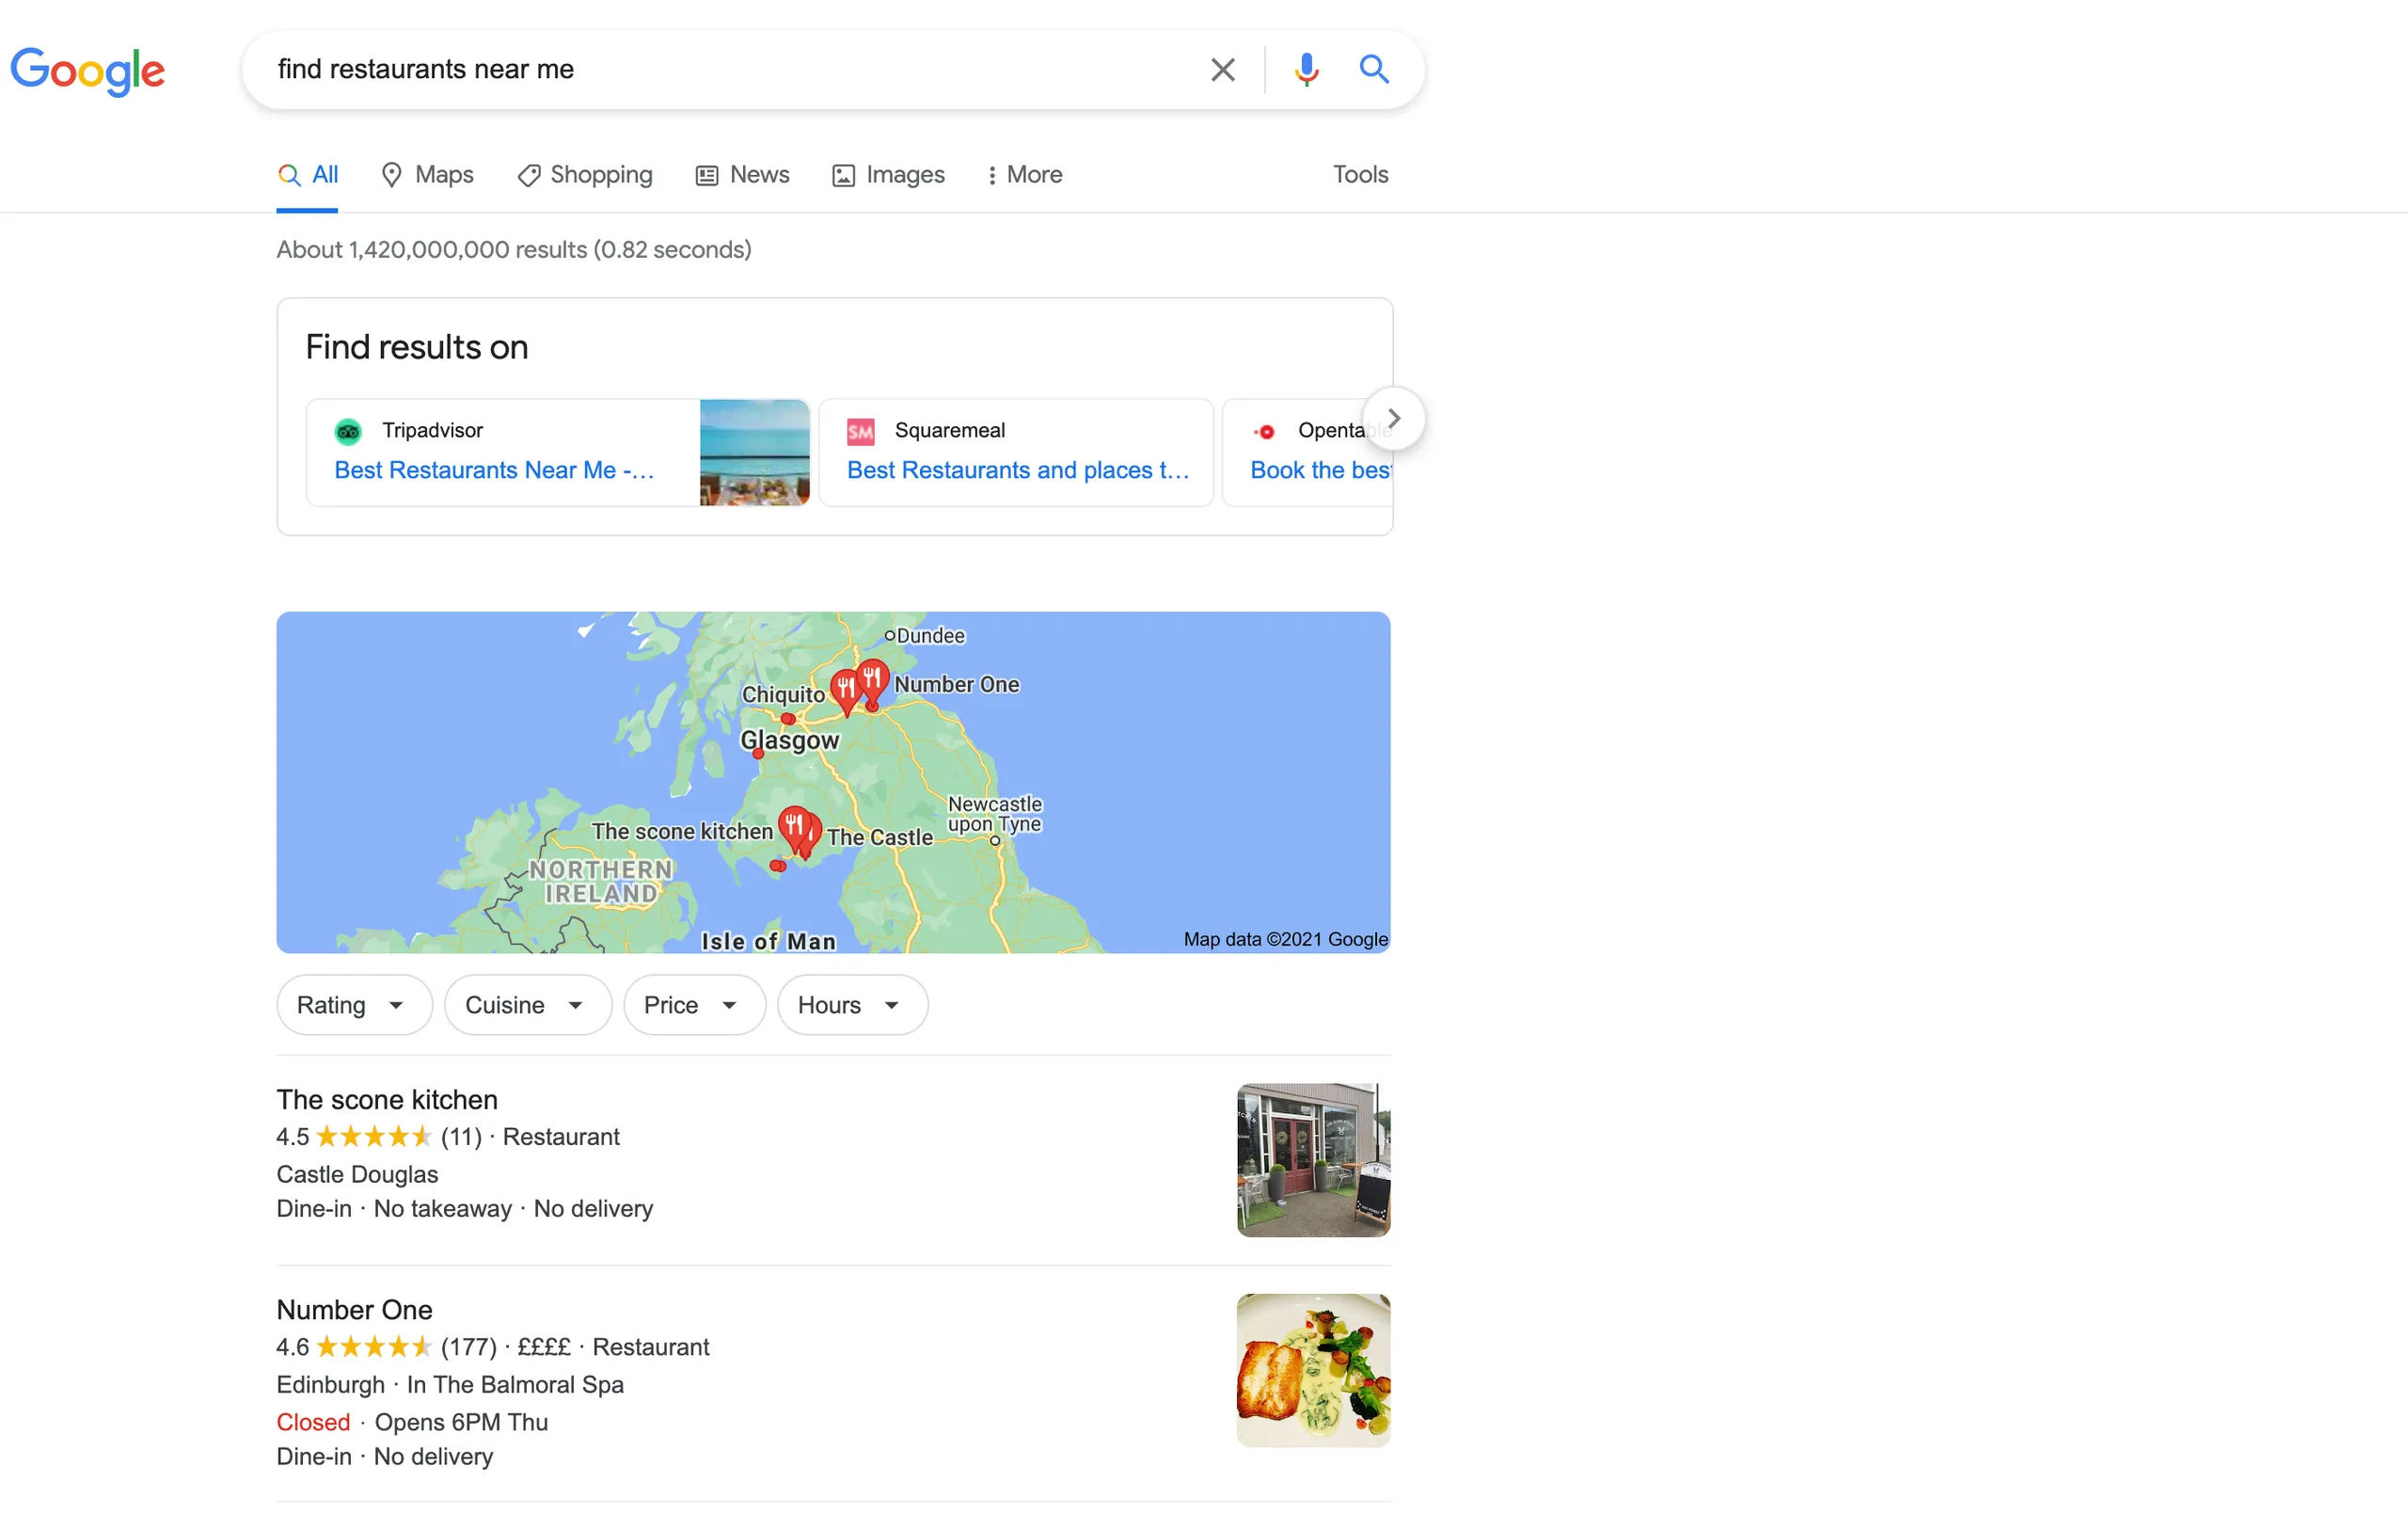
Targeting local keywords such as "find restaurants near me" or "bakery Manchester city centre" are great examples of local keywords to target for localised, mobile search queries.
Users making a local search on mobile likely want key information, and they want it fast. This is where you can leverage your Google My Business page too by making sure it features all of the key information that mobile searchers are likely to be looking for, such as location, opening times and contact details.
Page Speed & SEO
It's not the noughties anymore. Nobody is willing to sit around and wait for a website to boot up. People expect websites to load instantly, and if yours doesn't, then they'll find one that does. Page speed is critical for two reasons:
- It has a significant impact on the user experience of your website.
- Google has confirmed that page speed is a ranking factor.
Not only does Google class page speed as one of its ranking factors, meaning you won't hit the top spot if your website is slow, the longer it takes for your website to load, the fewer pages Google will have time to crawl within its crawl budget. It pays, therefore, to make sure your website page speed is up to scratch.
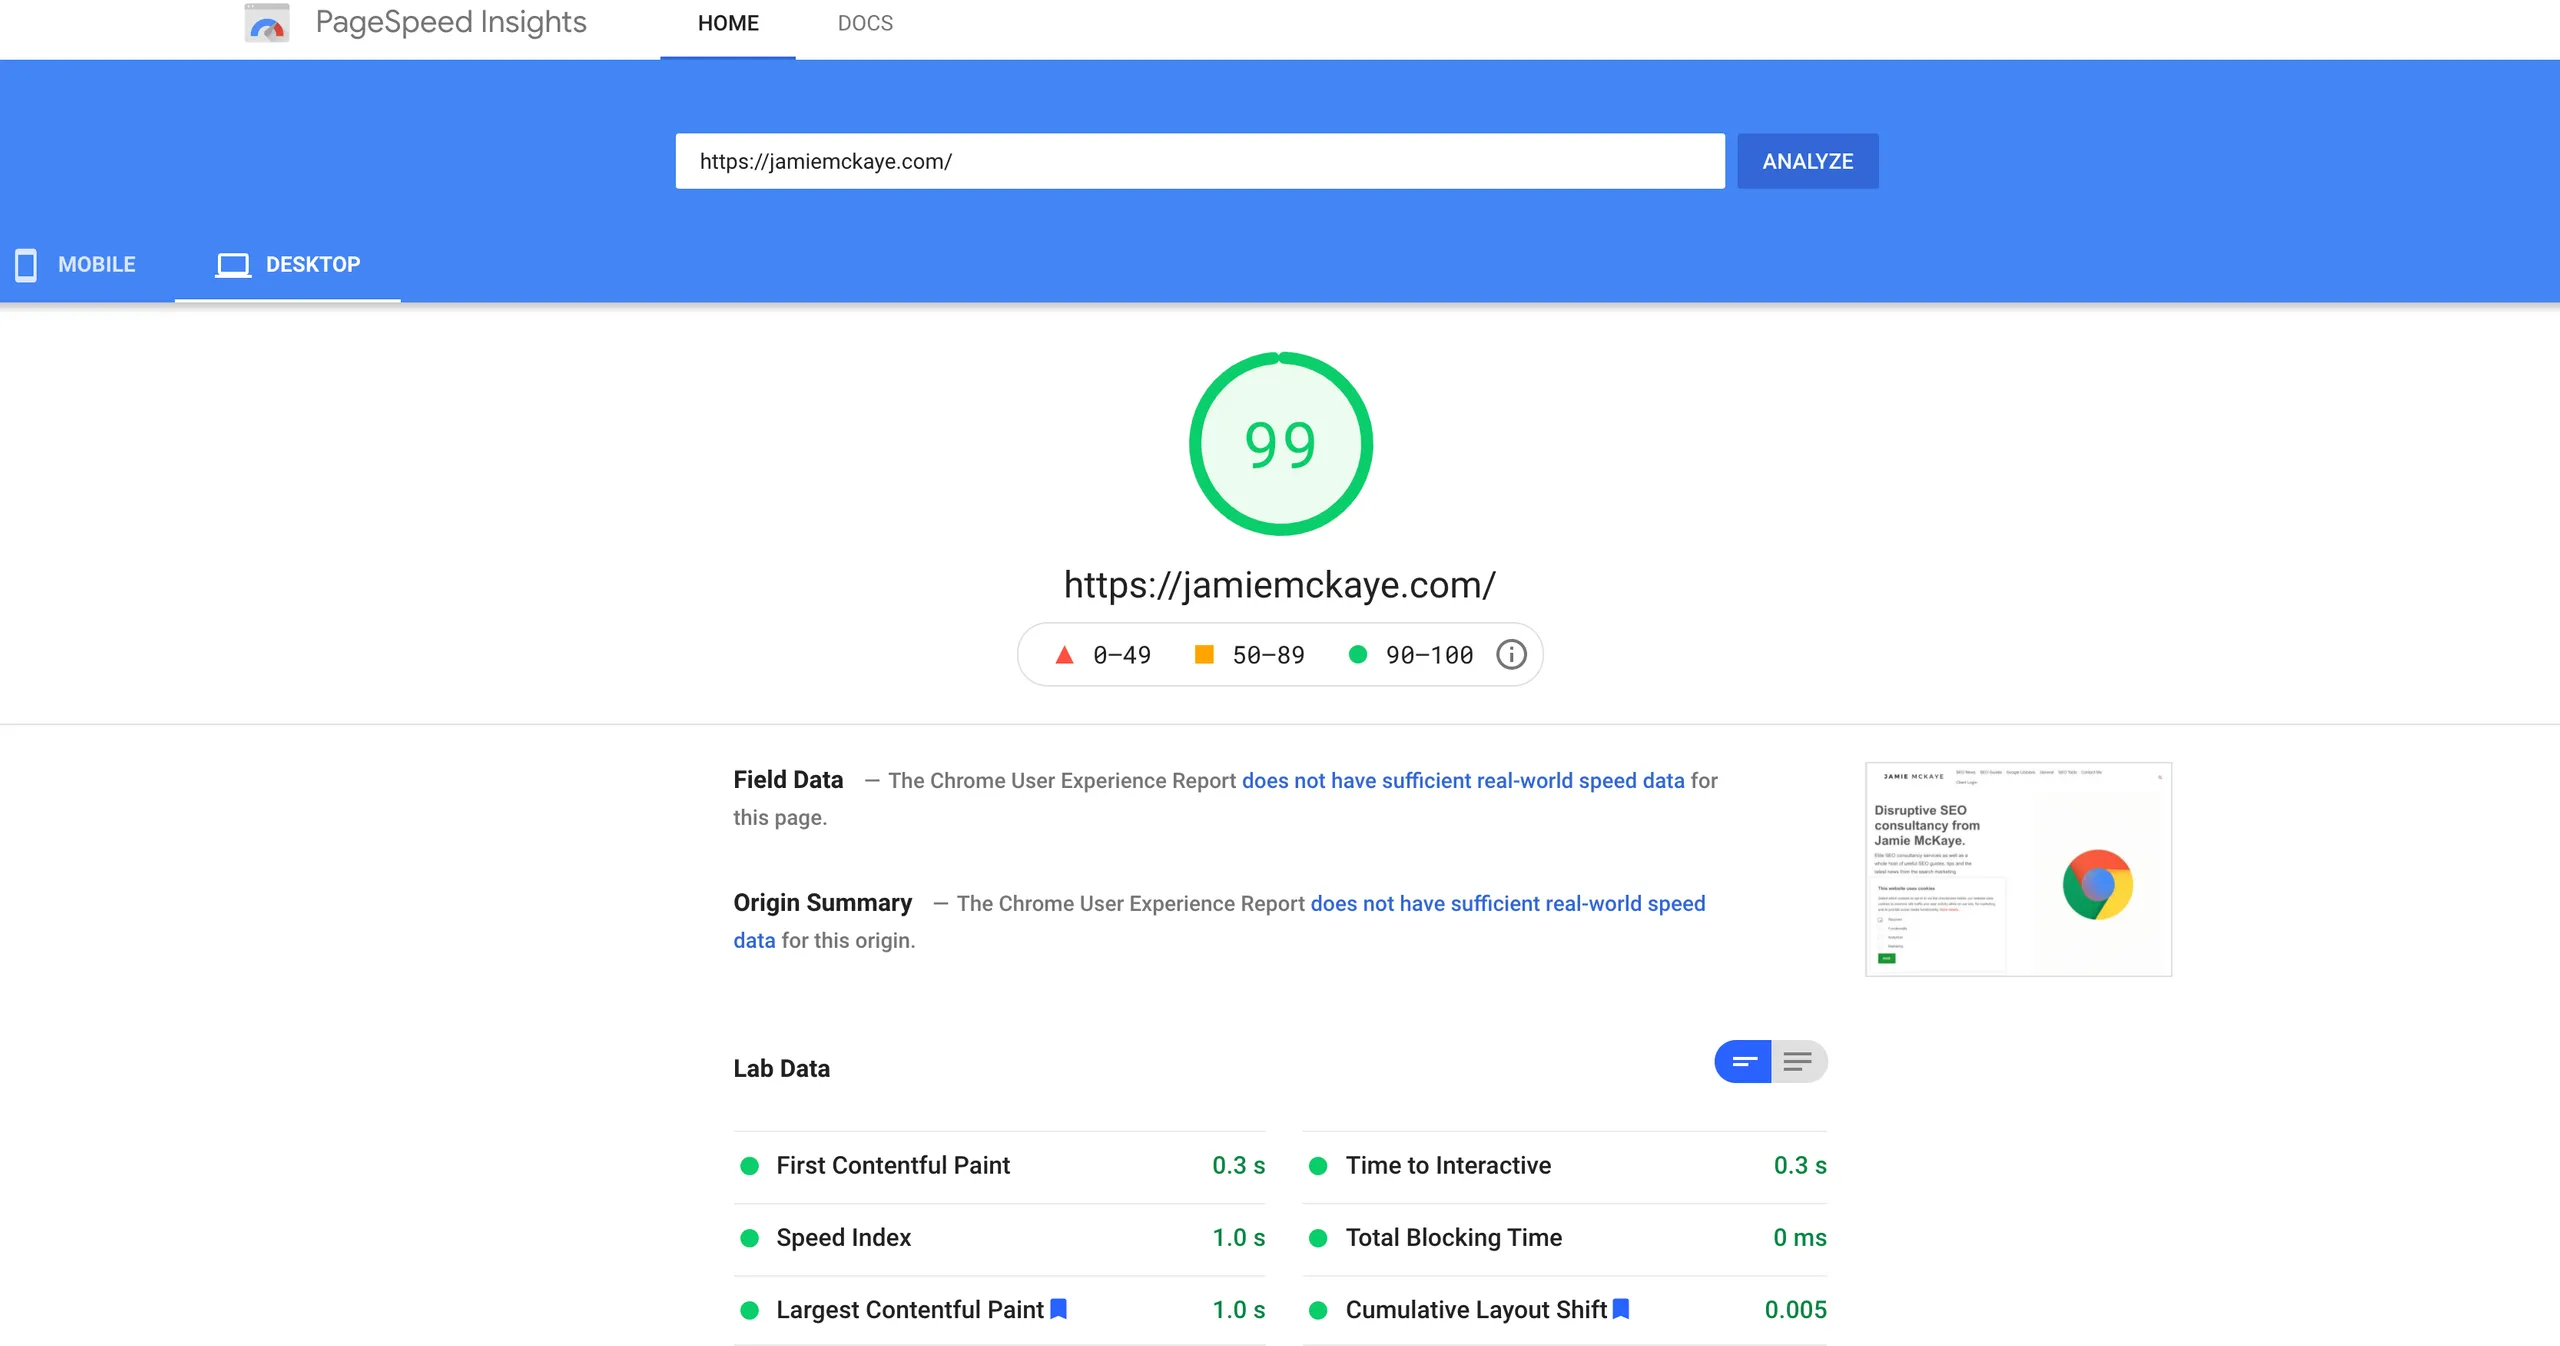
So what can you do to help improve the page speed of your website and ensure you're delivering content to users quickly?
Web hosting - The first thing that impacts your page speed and people often forget about is your web hosting. If the server response time if your hosting is slow, then implementing all the tips and tricks in the world will have little impact on your page speed. Make sure you opt for a quality host who can support your needs.
I can personally recommend Siteground. They utilise Google Cloud hosting (lightning fast), have terrific support and have unbelievably good uptime. You can sign up here with a discount.
Caching - Caching is the process where part of your website is remembered either by your server or the user's browser to make the loading time of your website quicker. Caching means that a browser doesn't have to reload every website element every time a user returns. There are two main types of caching:
- Browser caching is done by the user's browser and saves files such as javascript and fonts the first time a user visits a website. If they return, the browser won't need to download these again, and the load time will be faster.
- Server-side caching operates within the server and allows the server to save and present the results of common actions. A server can predict that the results of certain actions on a website will be the same each time, and rather than downloading images, content and files every time the action is undertaken, it will instead present the saved files to a user. The end content is no different, but the time it takes to present it is.
Third-party scripts - Limiting the number of third-party scripts that you run on your website can help to speed up its load time. Third-party scripts include WordPress plugins, chat widgets, comment services and scripts providing analytics or remarketing services.
If you want a fast website, and we're guessing you do, then you don't need to get rid of every single third-party script that you're running on your website. Instead, you should:
- Limit the number of third party scripts to only the essentials. Especially with WordPress plugins, it can be easy to install one only to never really use its features, yet it's still running and slowing down the load time of your website. Try to stick to only the ones that make your website better and your life easier.
- Try to delay the activation of third party scripts if possible. Elements such as commenting services and chat widgets can be activated after a few seconds or only when users make their first action/scroll down the page. This will help the initial load time of your website considerably.
It's a good idea to check your plugins to make sure there isn't any overlap either. There are often multiple plugins for any one task, and you may find you've got three different plugins installed, all claiming to do the same thing. Dropping this down to just the one you need will help speed up your website's load time.
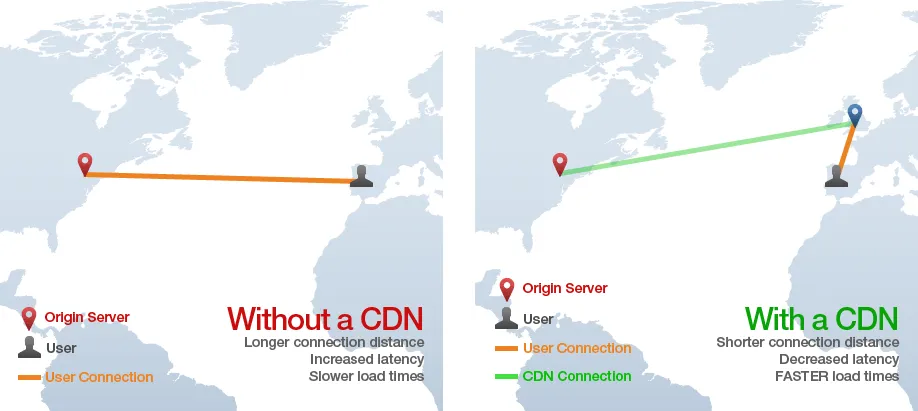
Content Distribution Network (CDN) - Content Distribution Networks (CDN) are servers used to help deliver website content to users. Copies of your website are stored on a CDN, usually in various geographical locations, allowing users to have easier and faster access to your website. CDN's help to minimise the website's loading time by reducing the physical distance between the server and the user, ensuring that users worldwide access the same high-quality content at the same speed.
Redirects - If you've ever deleted or moved pages, then the likelihood is you'll have redirects running in some capacity on your website. They're also a great way to fix broken links, which can have a negative impact on your overall SEO success. However, having too many redirects can lead to additional HTTPS requests, which will slow down the speed of your website, especially on mobile devices.
Ideally, it would help if you kept your redirects to a minimum. Google has even advised against using them at all, but it's almost impossible not to if you've ever re-structured or removed content. Make sure all of your redirects are there for a purpose, and if any can be removed, do so.
Optimise images - One of the most common things that can slow down your website is your images. Large image files can often take forever to load, slowing down the performance of your whole website in the process. If you optimise your images, though, ensuring they aren't too big, you should notice a difference. The main ways you can optimise your photos include:
- Resize your images - Not resizing images is one of the most common mistakes regarding page speed. Before you upload your pictures to your website, use a photo editor to resize them. Use your website width as guidance to ensure they aren't too big. For instance, if your blog content area width is 900px, don't upload an image that has a width of 2000px; it will be far too big and will take an eternity to load.
- Choose the correct file type - There is more than one image file type, and making sure you use the right one can have a significant impact on both the quality of your images and the size of the file, which in turn will impact the time it takes for them to load on your website. There are four main image file types: JPEG, PNG, GIF and SVG. You should use each of the file types for different purposes:
JPEG - Images
PNG - Line drawings or images that contain text
GIF - Animated Images
SVG - Logos or simple illustrations
- Image compression - Image compression helps reduce the size of images by removing unnecessary image data without impacting the quality of the picture. Compression doesn't affect the physical dimensions of an image; instead, it alters the 'weight' of the image by removing data. Compressing your images can help them load faster and allow your website to take up less space on your web host. You can compress your images manually yourself, or if your website operates on WordPress, various plugins will do it automatically.
- Lazy Loading - Lazy loading is a technique that means not all of the content on your web page will load straight away. Instead, the critical information and content will load first, with the rest loading when required. When it comes to images, it means that only the images a user can see will load initially; then, as the user scrolls and navigates around the page, the rest will load as required. Lazy loading is a good technique for speeding up the load time of your web pages as there's often the chance that you're loading up content the user will never see. Not loading images until a user has reached that section of the page and not before ensures you're not wasting valuable power and time loading unnecessary content.
You can check your page load speed for yourself by using a tool such as Google Page Speed Insights, which will measure your page speed and highlight the most common page speed issues.
Image Alt Text
Image alt text or alternative text describes an image that sits within the HTML of your webpage. Image alt text, also known as alt tags or alt attributes, is essential for two key reasons:
- Improves the user experience and accessibility of your website
- Improves image SEO
User experience - Alt texts original purpose was to describe images to users with visual impairments, helping make websites more accessible. Users who struggle to view images for whatever reason will often use a special screen reader, which will use the image alt text to describe the image to the user.
Having a well written and accurate alt text, therefore, helps improve the website's user experience and ensures that the content on your website is accessible to everyone. Alt-text is also displayed in place of an image if a browser cannot load an image or a user has selected not to load images when visiting a website.
Image SEO - Alt text can also be used as an SEO tool. Google and other search engines struggle to "read" images in the same way that humans do. Therefore, they also rely on the alt text to help them fully understand what the image is and its relevance to the content and targeted keywords. Without alt-text, Google risks misunderstanding the context of the image within the broader content on the web page.
Alt text can also help your images to rank in Google image search results. Alt text that is optimised for relevant keywords can act as a ranking signal to Google. If your images appear in search results, this, in turn, will help direct traffic to your website. The more thoroughly you describe your content to Google, the more information it has to rank your web page accordingly.
So how can you write image alt text to ensure it signals to Google what you want it to? The first thing to remember is that alt text has a dual purpose, and you're writing for two audiences. Whilst you want it to be optimised for your keywords for SEO purposes, you must ensure it accurately describes the image for users who need it. To meet the needs of both users and Google, you need to:
Describe the image - The key thing to think about when writing your alt text is to describe the picture accurately. Don't overcomplicate things, simply describe what the image shows in an accurate and easy to understand manner. Also, remember that if the image includes text of any kind, you should feature this within the alt text.
When writing your alt text, you need to describe the whole image. For example, if the image is of a child eating ice cream, then say that, don't just describe it as a photo of ice cream.
Keep it short - Whilst your alt text needs to be descriptive and specific, it also needs to be short and concise. Try to keep your alt text to just a few words. When users view your website with the help of a screen reader, they don't want to sit through lengthy descriptions of a single image, especially if the image isn't even the main part of the content. Many screen readers and browsers will also only read the first 125 characters of an alt text so bear this in mind when writing yours.
Use your keywords - If possible, try and feature your keyword in your alt text but only do so if it's relevant. Your alt text is a great place to use your keyword, as Google will use the alt text when crawling and indexing your images. Your priority should be accurately describing the picture though, if it has absolutely nothing to do with your keyword, then don't add it just for the sake of it. This could end up doing more harm than good.
And what should you avoid when writing your image alt text?
Keyword stuffing - Whilst one mention of your keyword, when relevant, can work wonders for your image SEO, stuffing the alt text full of keywords will have the opposite effect. If Google thinks your alt text appears unnatural or spammy, it won't rank your images in search results, and it could have an impact on the ranking of the overall web page. Similarly, an unnatural or keyword-stuffed alt text will ruin the user experience for those who rely on alt texts to access your content.
Use phrases like "this is a picture of" - Both Google and screen readers already know that your alt text is describing an image, so you don't need to tell it again. Phrases such as "an image of" or "this picture shows" will waste valuable characters. Instead, get straight to the description. In some instances, it pays to describe the type of images such as graphs or illustrations.
Vague descriptions - When writing your alt text, you can't presume that users know anything about the image or its features. One of the most common mistakes people make when writing their alt text is using phrases like "company logo" wherever your logo features. This is undescriptive and offers no information or value to either Google or the user.
Forgetting to update your alt text - Often, once they've written their alt text, people will forget ever to go back and check on it. Whilst this doesn't matter so much if your images stay the same if you undertake a re-brand or update your banner ads, not updating your alt text risks you giving users and Google out of date information.
You don't always need to use alt texts on your images. There are a few exceptions where adding alt text is an unnecessary step:
- Images for illustration only. Often websites will include images as a way of breaking up the text for aesthetic purposes. These images will typically offer no information or value to the user. Whilst you can still add alt text to them, it won't necessarily provide any added value.
- Descriptive captions. Sometimes the caption or the text immediately before or after an image will already describe the image. In this case, you don't always need to add the same description to the alt text.
Meta Descriptions and Title Tags
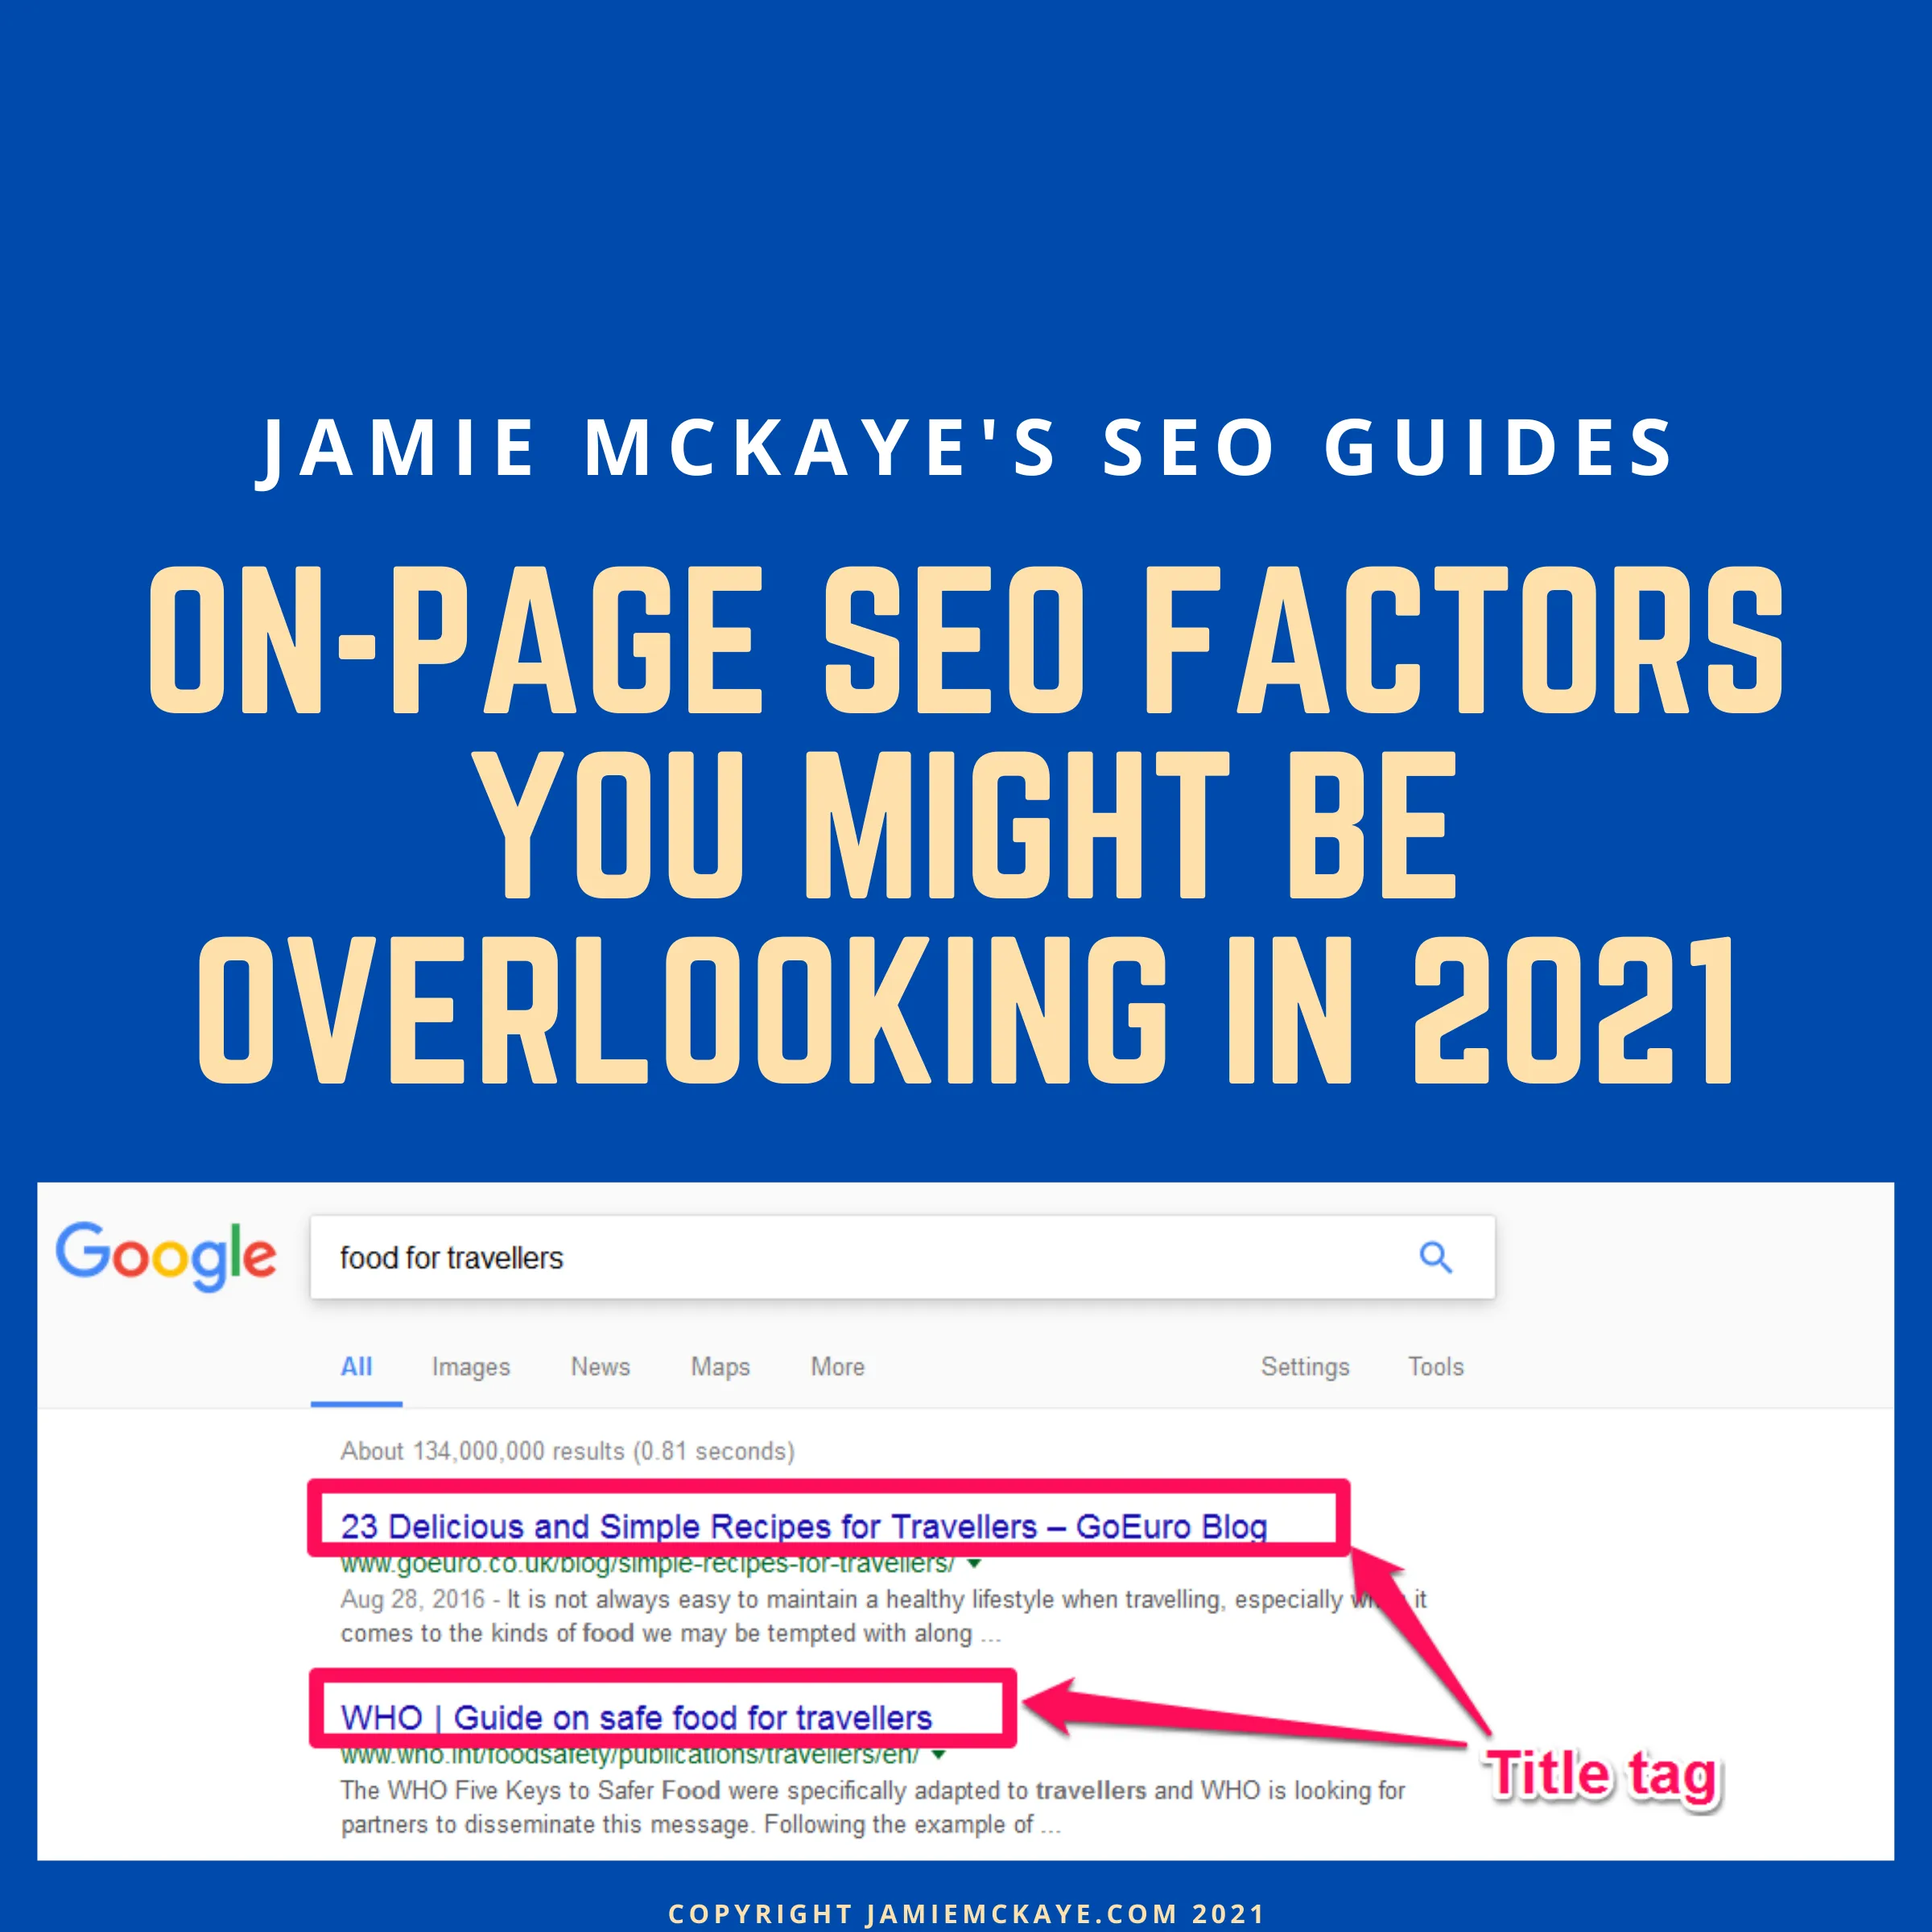
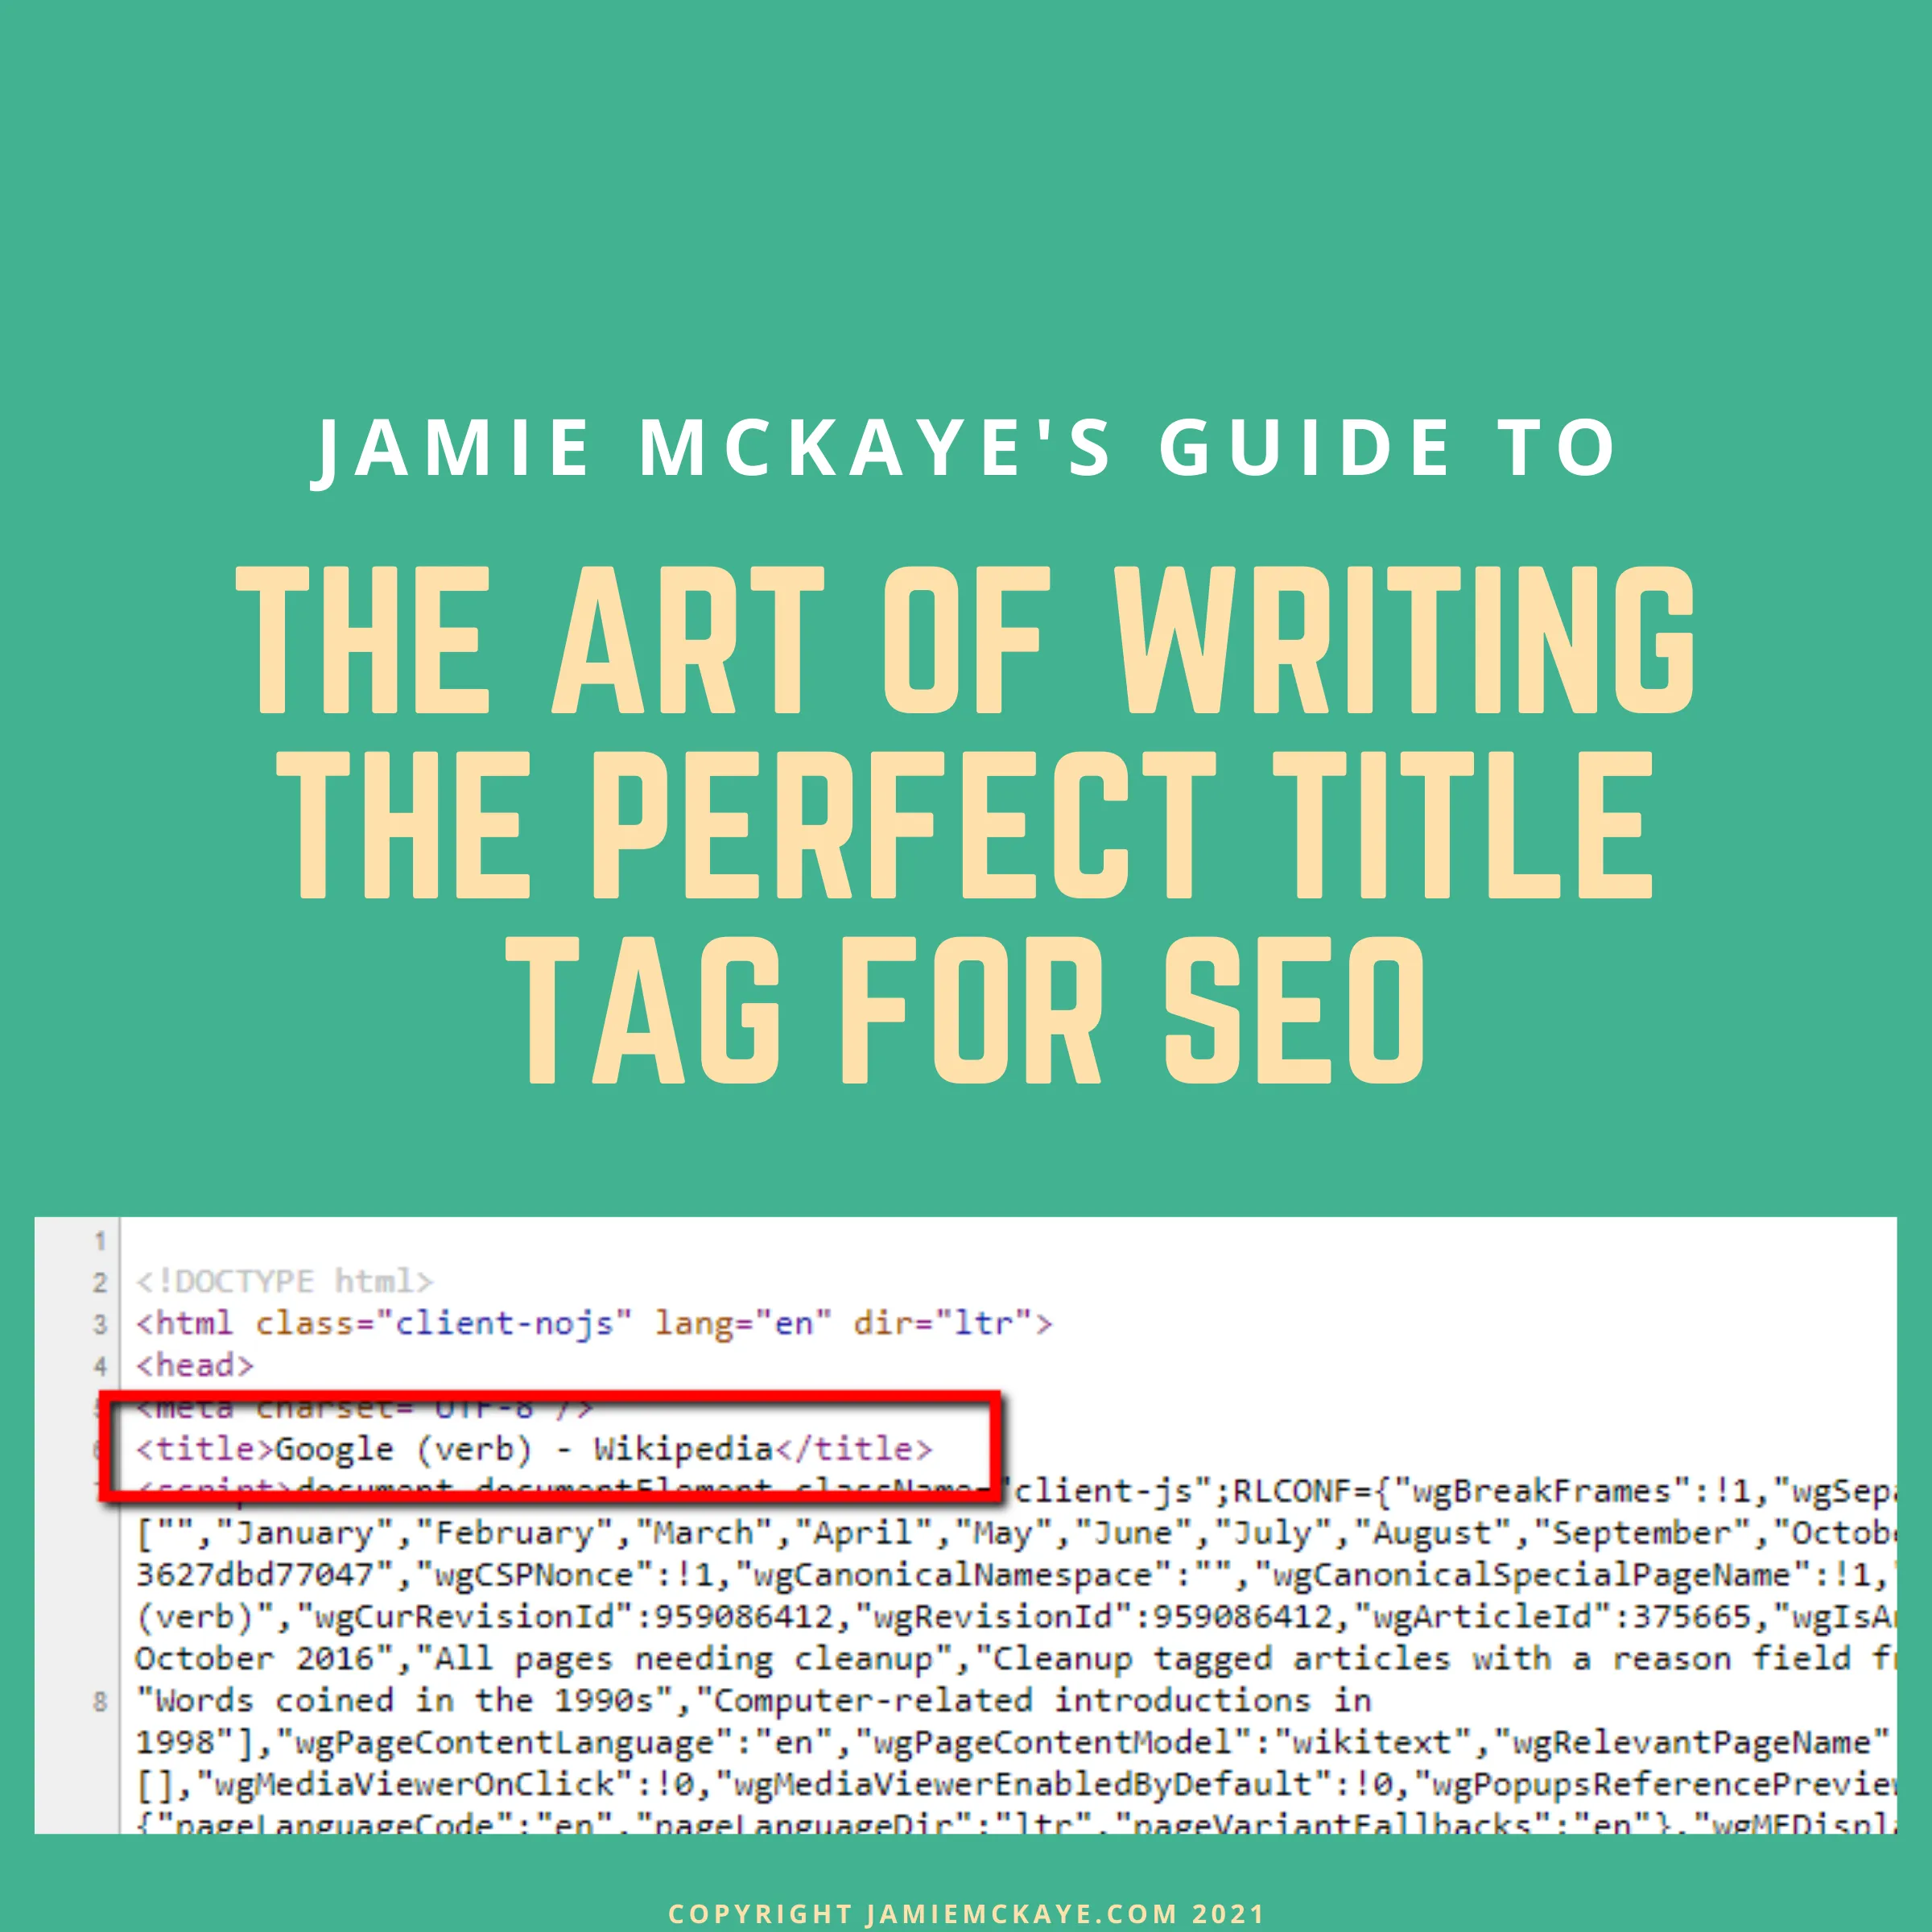
Meta descriptions and title tags are the content that actually appears in search results. When a user is presented with the SERPs after making a search query, they will face a list of web page options. The title of each result is the title tag, whilst the meta description is the short description of the web page content that appears underneath the title.
They're both a great way of telling Google exactly what the content on your web page is about, which will help Google to determine its relevance to the search query. However, the key function of meta descriptions and title tags is to help increase the click-through rate and the number of visitors to your website. Your title tag and meta description directly tell the user about the content on your web page and should help to encourage them to choose your listing from the search results.
A well-written meta description and title tag are crucial if you want to catch users' attention and convince them that your web page features the content they're looking for. Ranking in results is excellent, but you need users to choose your listing and visit your website for them to convert.
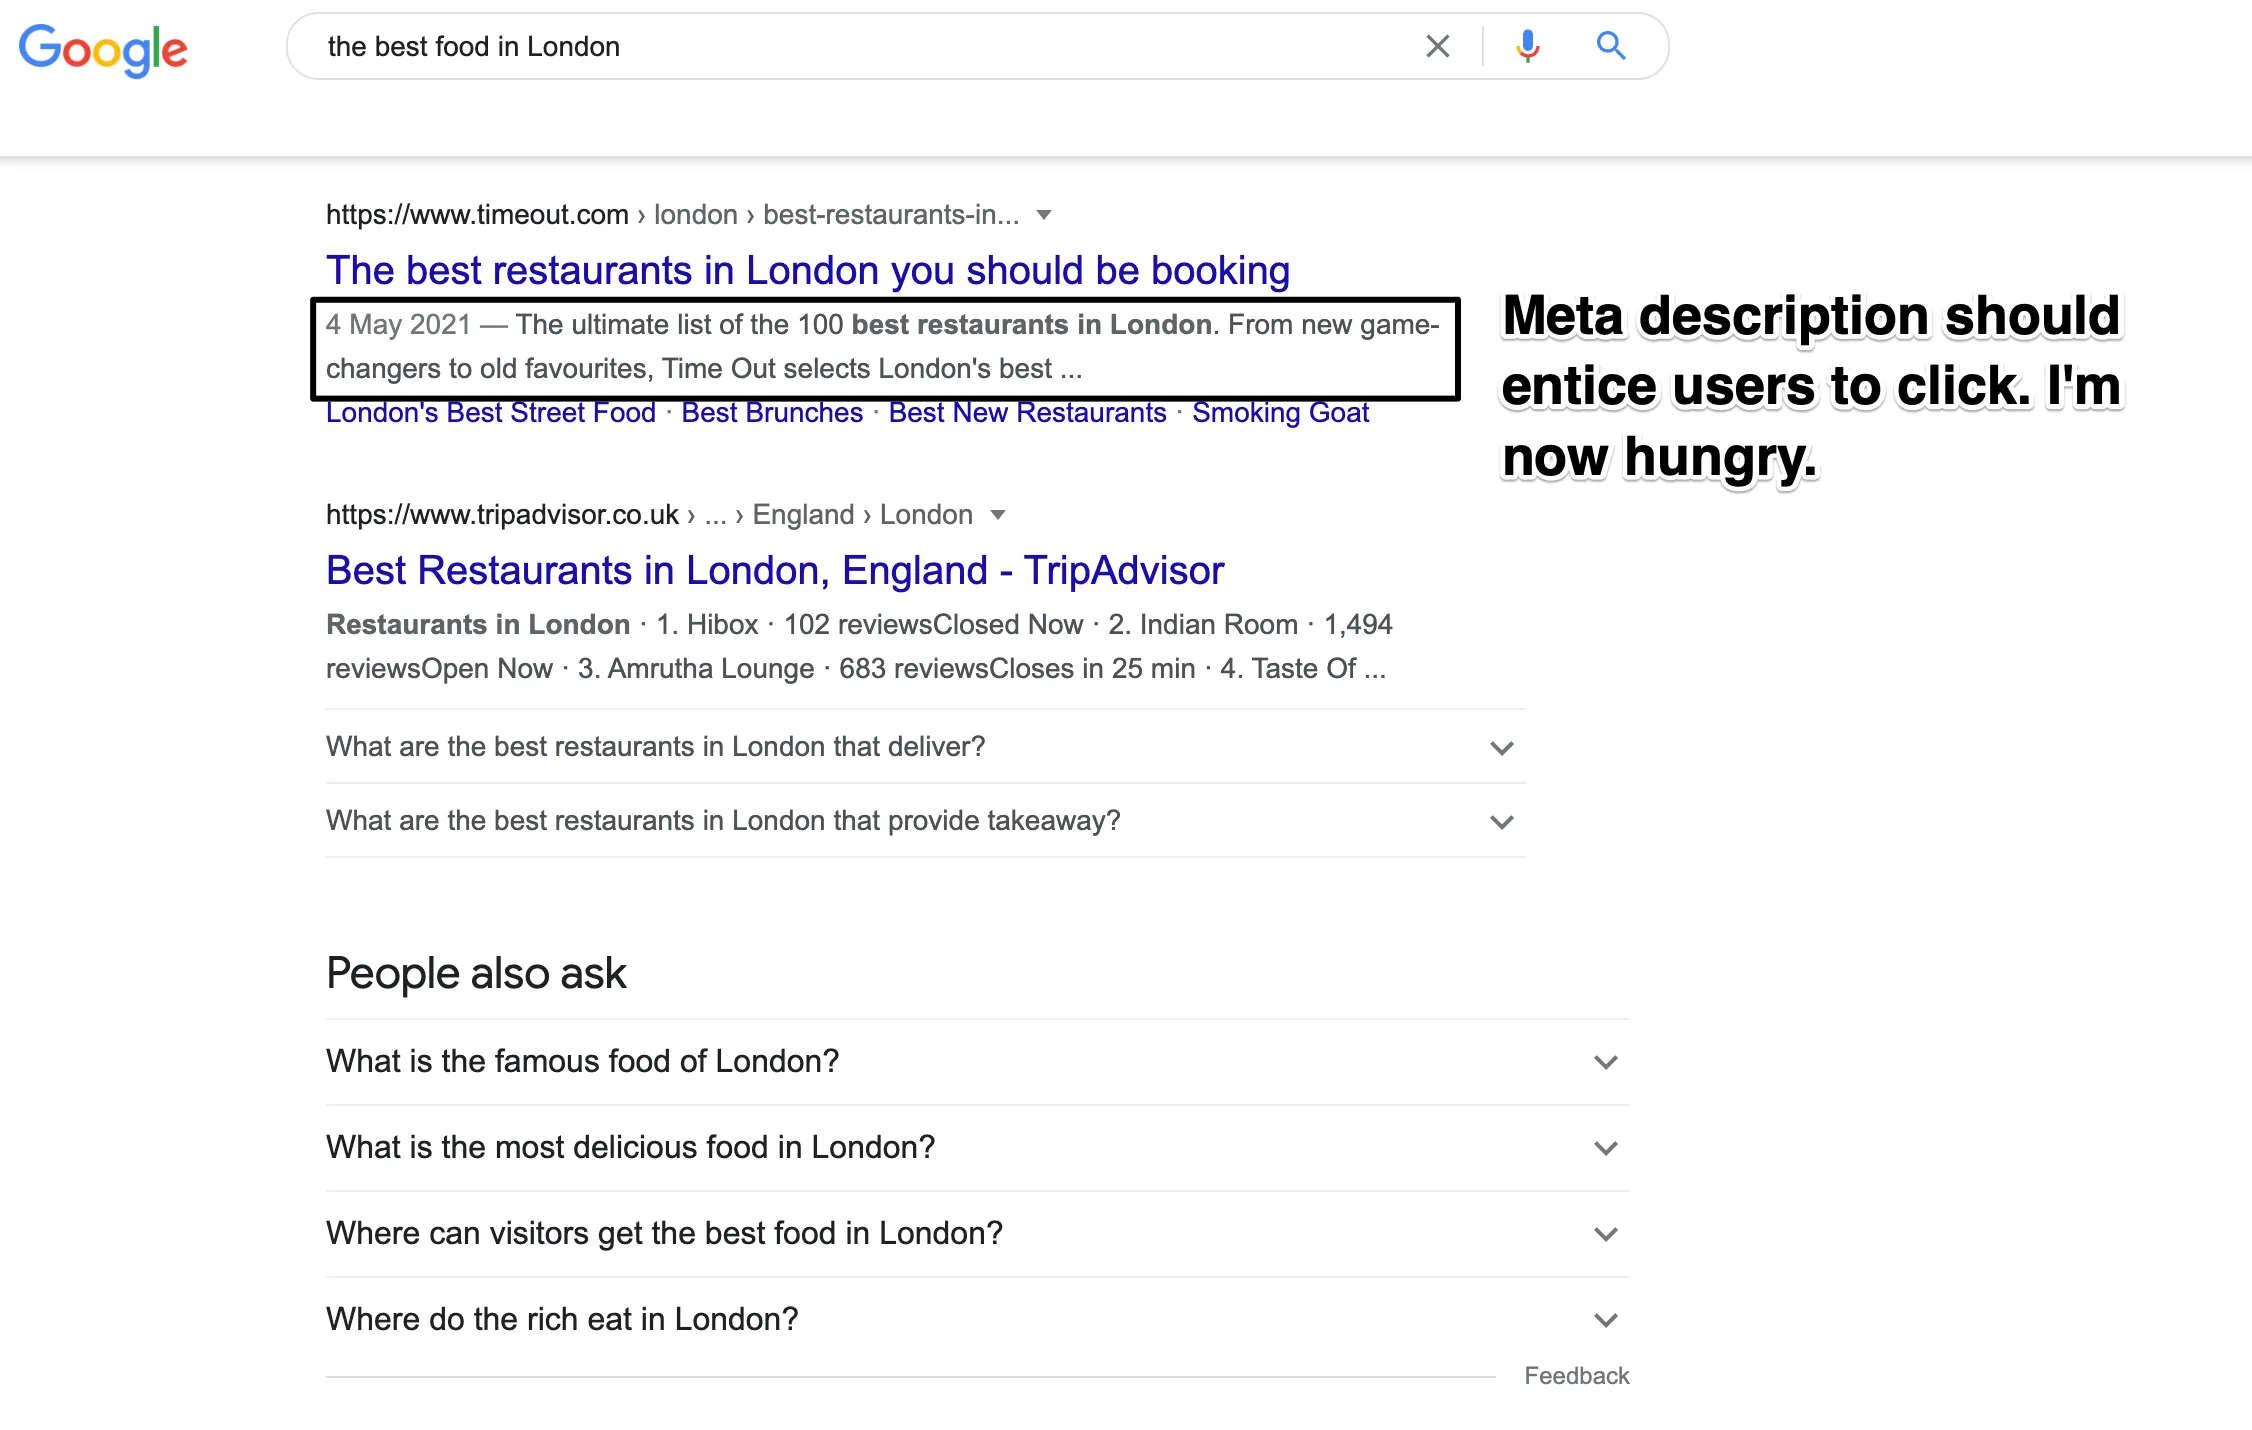
So how can you write a great meta description and title tag that will work?
Include your target keyword - Title tags and meta descriptions are a great place to put your target keyword. Both elements are used to tell Google and users what the content on your page is about, so it shouldn't come as much surprise that your keyword should be in there.
Make sure it's the right length - Google has a limit on the size of both title tags and meta descriptions, so you need to make sure that you're within the count. If you go over, then Google will simply cut the end off, likely impacting how well the title tag or meta description performs. The length limits are based around pixels rather than characters, with Google limiting title tags to 600px and meta descriptions to 960px.
Front-load your keyword - One of the key things your title tag and meta description need to grab users' attention. Placing your keyword at the start of both is a great way to immediately highlight the relevance of your content to the search query. Having your keyword at the beginning also means that should you accidentally make it too long and Google cuts off the end, at least your target keyword will still be there.
Write naturally - Title tags and meta descriptions are relatively unique in the SEO world in that they need to cater to both search engines and the end-user. It can be easy to fall into the trap of optimising them for search engines but making them sound unnatural and Sammy. Write in a way that will catch the user's attention and inform them about your content, don't alienate them before they've even clicked through to your website.
Make sure it's accurate - The most important thing to remember when writing your title tags and meta descriptions is that they need to be accurate. Whatever you write should be a valid and relevant description of the user's content on the web page.
If a user clicks on your web page based on the information presented to them in the SERPs only to find that the content on your web page isn't what they're looking for, they'll bounce straight back off, adding to your bounce rate and indicating to Google that your content shouldn't be ranked for that search term.
Grab attention - You can use your title tags and meta descriptions to help convince users to click on your website instead of one of your competitors; therefore, you need to think about what will make you stand out from the competition. What makes your content unique and the best? Try to avoid using all capital letters and too much punctuation, though.
And what should you not do when writing your meta description and title tag?
Don't make it too short or too long - As I've already said, Google will limit the length of your meta description and title tag, so don't make them too long; otherwise, you risk losing some of the information. Similarly, though don't make them too short. You need to make sure they both provide enough information about the page to help both Google and the end-user to understand what your content is about.
Don't include jargon - Keep your title tag and meta description simple. Don't be tempted to fill it with jargon or over-complicated words and phrases. You want to encourage users to click through to your website by appearing natural and approachable.
Don't duplicate - Even if the content on some of your pages is super similar, don't be tempted to duplicate your title tags and meta descriptions. Each page needs its own unique one. Duplicate tags and descriptions will confuse Google, and it won't know which page it should rank for the search term, meaning neither will end up appearing in results.
It's worth noting that sometimes you can put a load of time and effort into your title tags and meta descriptions only for Google to go and rewrite them. Google will only rewrite them if, to be blunt, it thinks the original one is rubbish. If the search engine doesn't think the title tag or meta description is an accurate reflection of the content on the page, or if the quality is just not up to scratch, then it will rewrite them to something it thinks is better. If Google rewrites your tags, you can always return them, implementing some of these tips to help create a title tag that Google will approve of.
Featured Snippets
Featured snippets appear above the first results in Google's SERPs and are sometimes known as "position zero". Featured snippets aim to directly answer the question the user has made in their original search query.
For example, if you wanted to find out why humans yawn (and who wouldn't?!), you can see the featured snippet at the very top of the page that answers the question for you. Google has deemed this to be the very best answer to this question on the internet.
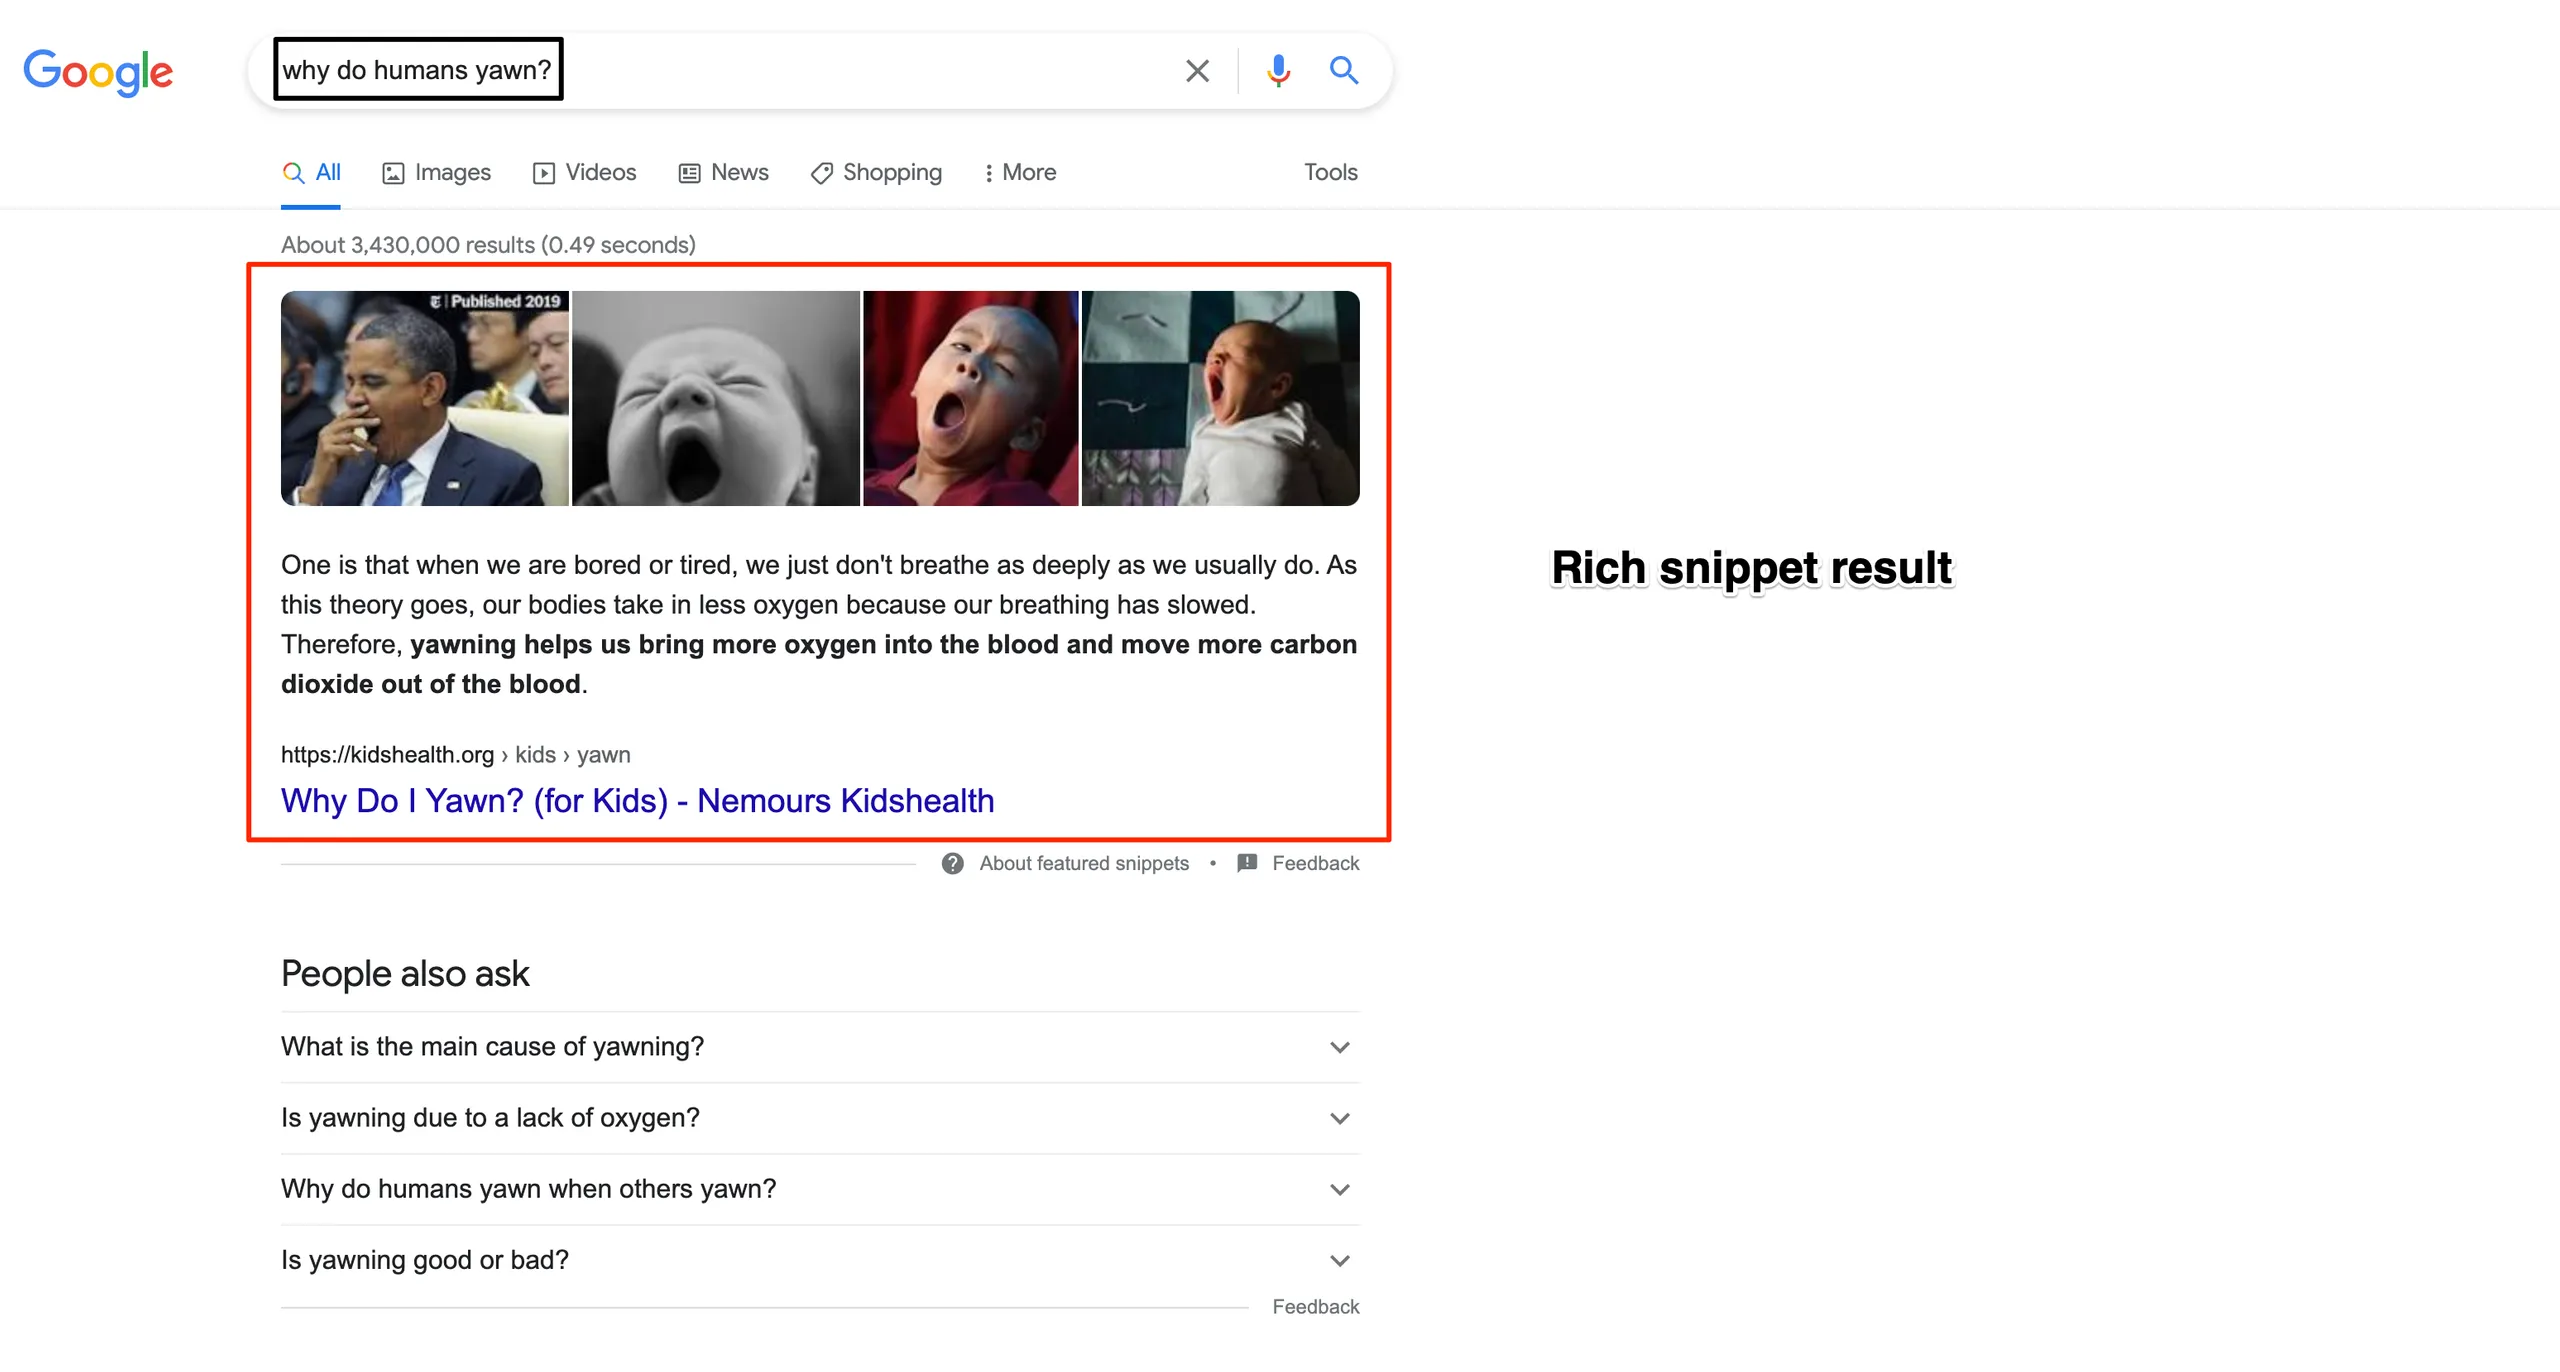
The page that appears as the featured snippet often doesn't rank in the number 1 spot. Often they will be down in second or third place. Featured snippets, therefore, allow you to effectively outrank your competitors even if they have the top spot in search results.
Google will usually include one of three main types of featured snippets in search results:
- Paragraphs in answer to who/what/where/when/why/how questions.
- Lists often for queries looking for step by step instructions, e.g. recipes.
- Tables used for data presentation or comparisons.
Featured snippets effectively give you more exposure in Google's search results, which should hopefully result in an increase in traffic to your website. The best chance you have of appearing in a featured snippet within Google's results is if your webpage already ranks in the top ten or the first page of Google results for the search query.
How can you get a featured snippet in Google results?
Look for search terms with a featured snippet - Due to the nature of featured snippets, the search queries that usually prompt them are those that feature a long-tail keyword as opposed to a primary, singular search term. Search queries that are a question or whose intent is informational are the most likely search queries to include a featured snippet in their results. Most keyword research tools will include a feature that lets you see if a particular target keyword currently includes a featured snippet in its SERPs.
Start by answering the question - The key to featuring in a featured snippet is to answer the question the user input into the search engine. Make sure your web page has a clear and concise answer to the question that gives the user as much information as required. For the best chance of appearing in a featured snippet, try to answer the question at the very start of your content before going on to add more additional context and information.
Take a look at your competitors - It's the tip that keeps on popping up, and whilst we're certainly not suggesting you outright copy your competition, if something is working for them and helping them to rank well, then there's a good chance you can make it work for you too.
Take a look at the search term you're targeting and see what the existing featured snippet is. Analyse the whole webpage, taking into account page layout, content length, image placement and the type of snippet used. You can then use this research to help form your content.
Stick to the word count - Google will choose which part of your content it uses within the featured snippet. Unfortunately, you can't earmark a specific section to be featured. Most featured snippets are around 40-50 words, so you can ensure that you answer the question within this word count.
We're not suggesting you simply make your content one paragraph long (in fact, Google tends to prefer longer-form content) but instead, you should answer the question briefly in one section before going on to elaborate further in the article. Use subheadings to help direct Google to the part of your content that directly answers the question.
It's almost impossible to promise that you'll land yourself a featured snippet, but by implementing these tips, you're putting yourself in the best possible position to do so. Not only that, but by making your content as relevant to the question as possible, you're giving Google even more reason to rank your web page well in its search results.
User Experience
Pretty much everything I've covered so far in this guide comes back to one thing; user experience.
Google is putting more emphasis than ever before on the quality of the user experience that a webpage offers and is constantly updating its algorithm with user experience in mind. Put simply, if Google thinks your website is poor or the user experience is bad, then it will never rank you in its results no matter how relevant, or high-quality your content may be.
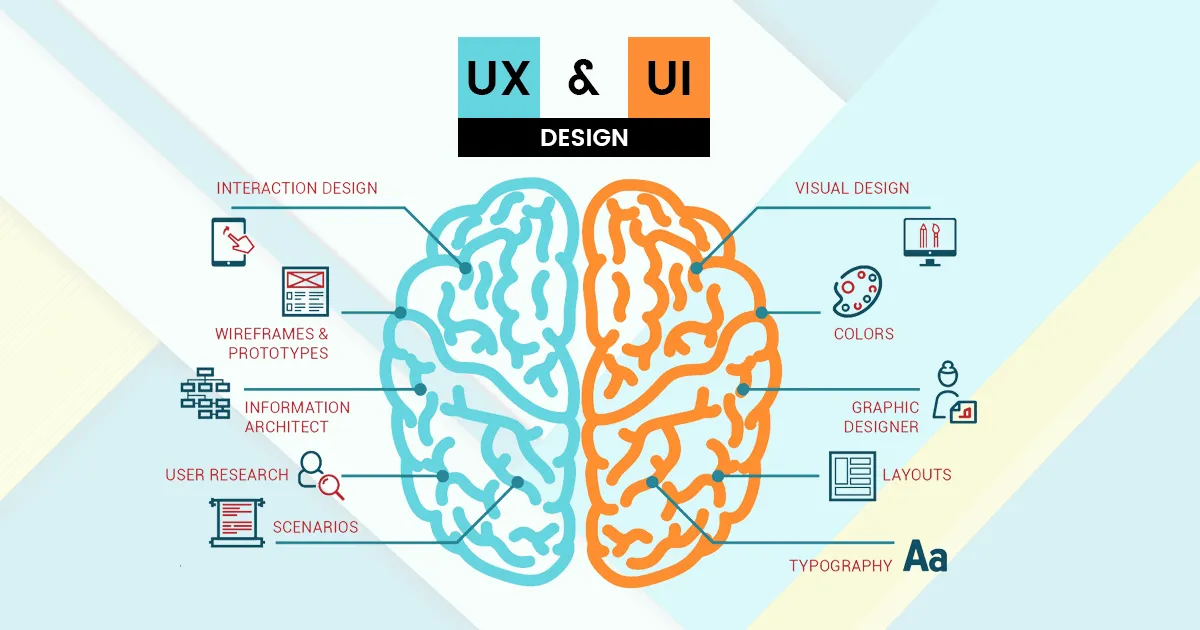
Google will rank pages that offer high-quality, relevant content presented in a way that users can easily navigate and explore. Combine all of the elements we've talked you through so far, and you'll be well on your way to ensuring the overall user experience of your website is second to none. If a user enjoys visiting and using your website, they are less likely to bounce off it and much more likely to both convert and return.
User experience and SEO go hand in hand. They both share the common goal of presenting users with the content they're looking for. SEO will direct the user to the content they're looking for, whilst user experience will provide them with the actual content and online environment they need.
There are various things, in addition to the elements already discussed, that you can do to help improve the user experience of your website, such as:
Simplify navigation - Users need to be able to move around your website quickly. Make sure you have a clear navigational structure and menus that are laid out to best help users find the pages and content they are looking for. Make life easier for your website visitors, not harder.
Invest in a responsive design - There's no excuse not to have a website that works on all devices in today's age. With more and more people using mobile devices to search the internet, it's crucial that your website can adapt to whichever device a user is using. Think about fonts, navigation and pop-ups that may work on a desktop that wouldn't convert well on a mobile screen.
Make use of different layout options - Think about how you present your content to the user. Nobody wants to be faced with pages of endless content. Make use of all of the different layout options your design offers you, such as headings, bullet points, images, video and internal links. Make visiting your website and absorbing your content an enjoyable experience for users.
If you want to stand any chance of ranking in Google's results, you need to ensure your user experience aligns with your SEO strategy. Almost every SEO tactic will have an impact on the user experience of your website in some way.
Here's Google's video on the foundations of User Experience:


Comments